WooCommerce Integration
- Basic Integration: Here's how to get your API Key from Bosta – steps.
WooCommerce Plugin Installation
Add the Bosta plugin to your WooCommerce website.
- Search for Bosta WooCommerce.
- Click Install Now.
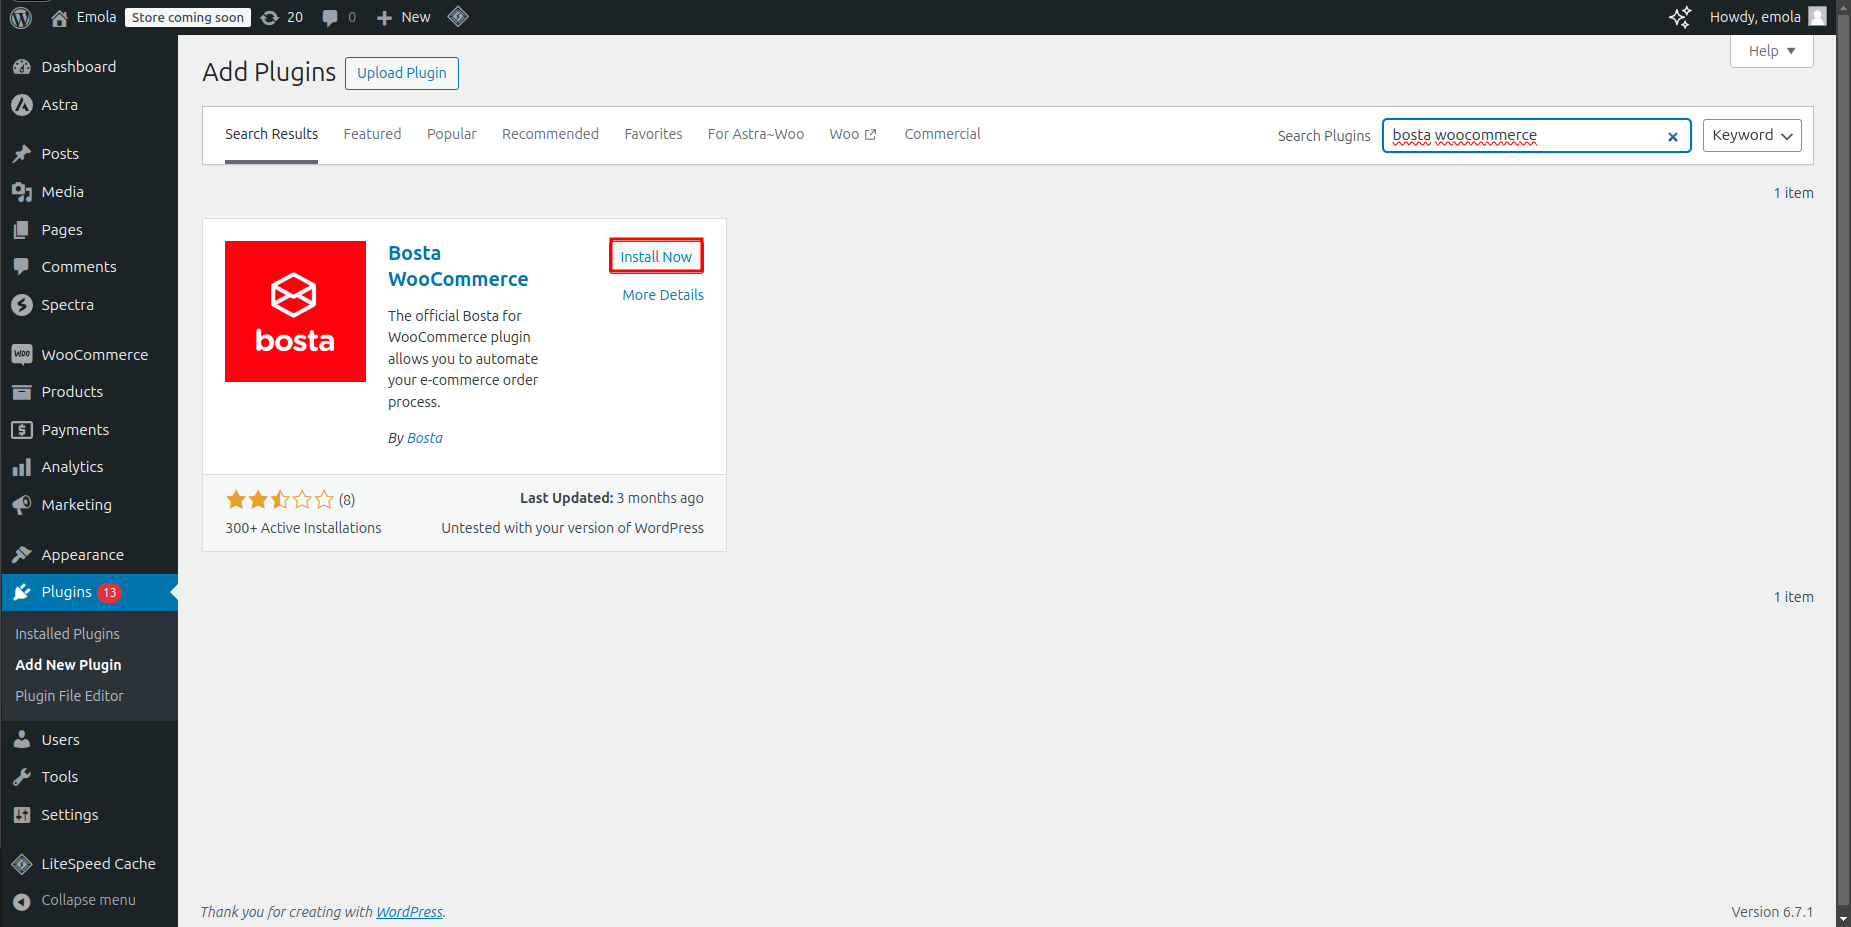
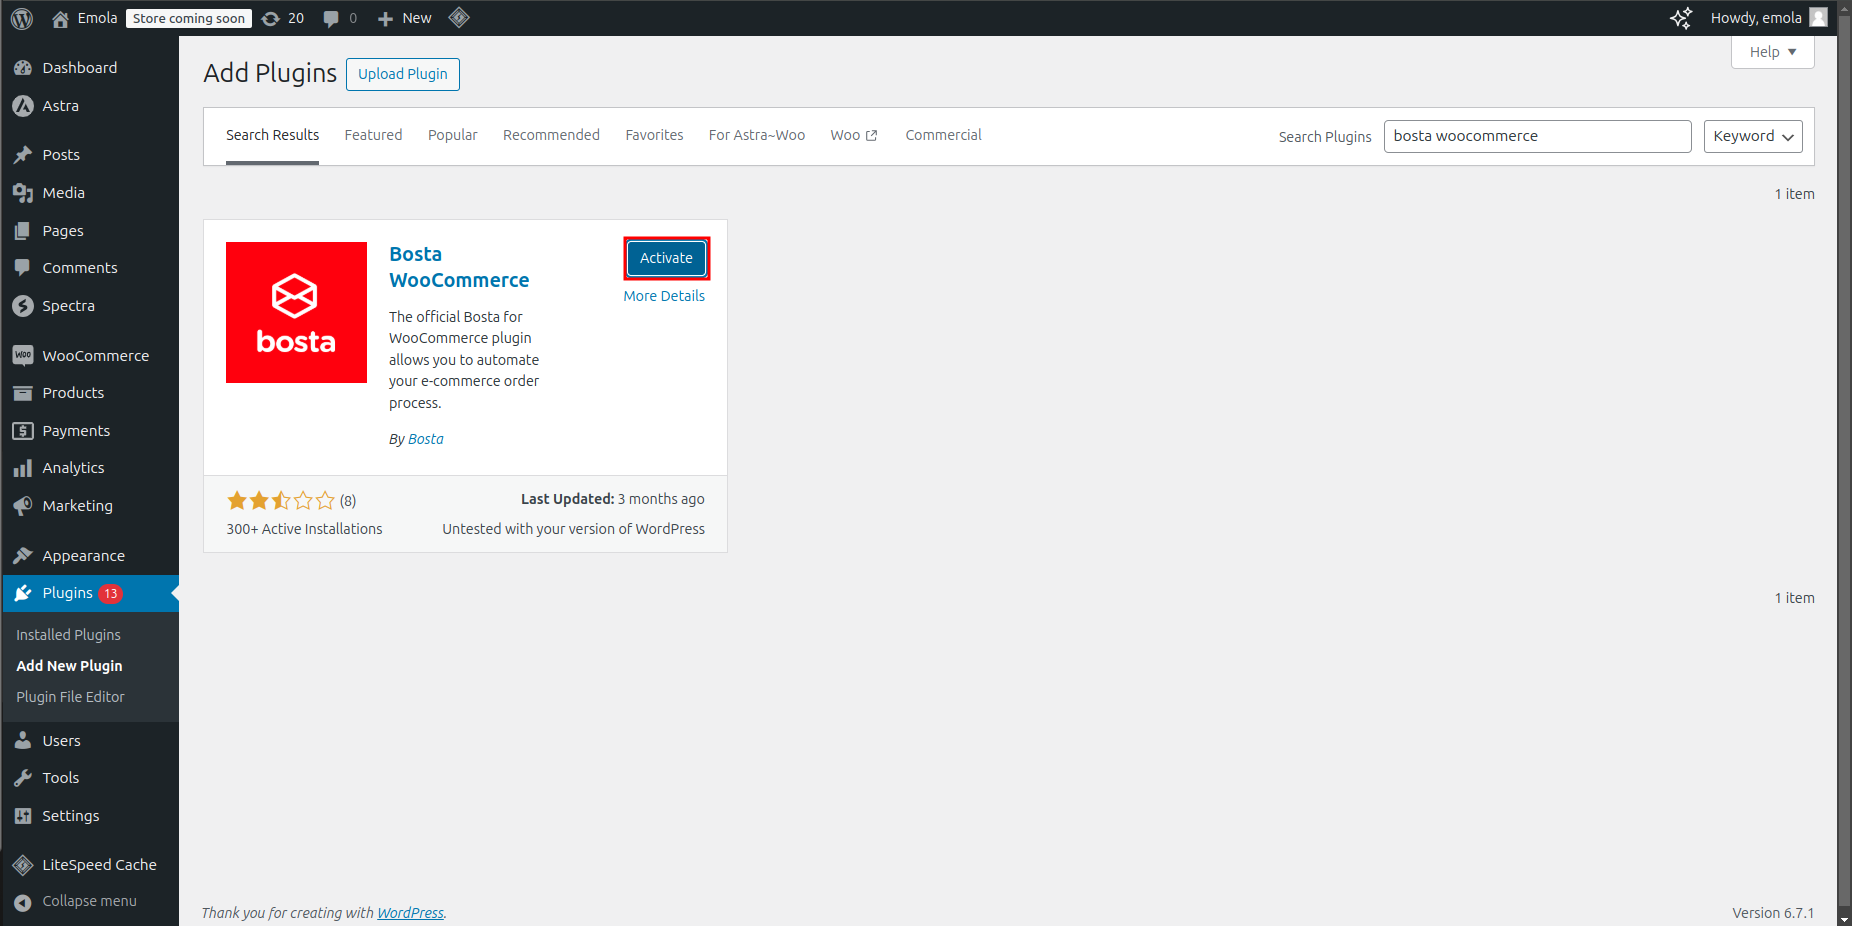
- Activate the plugin.
Connect Bosta Plugin to Your Bosta Account:
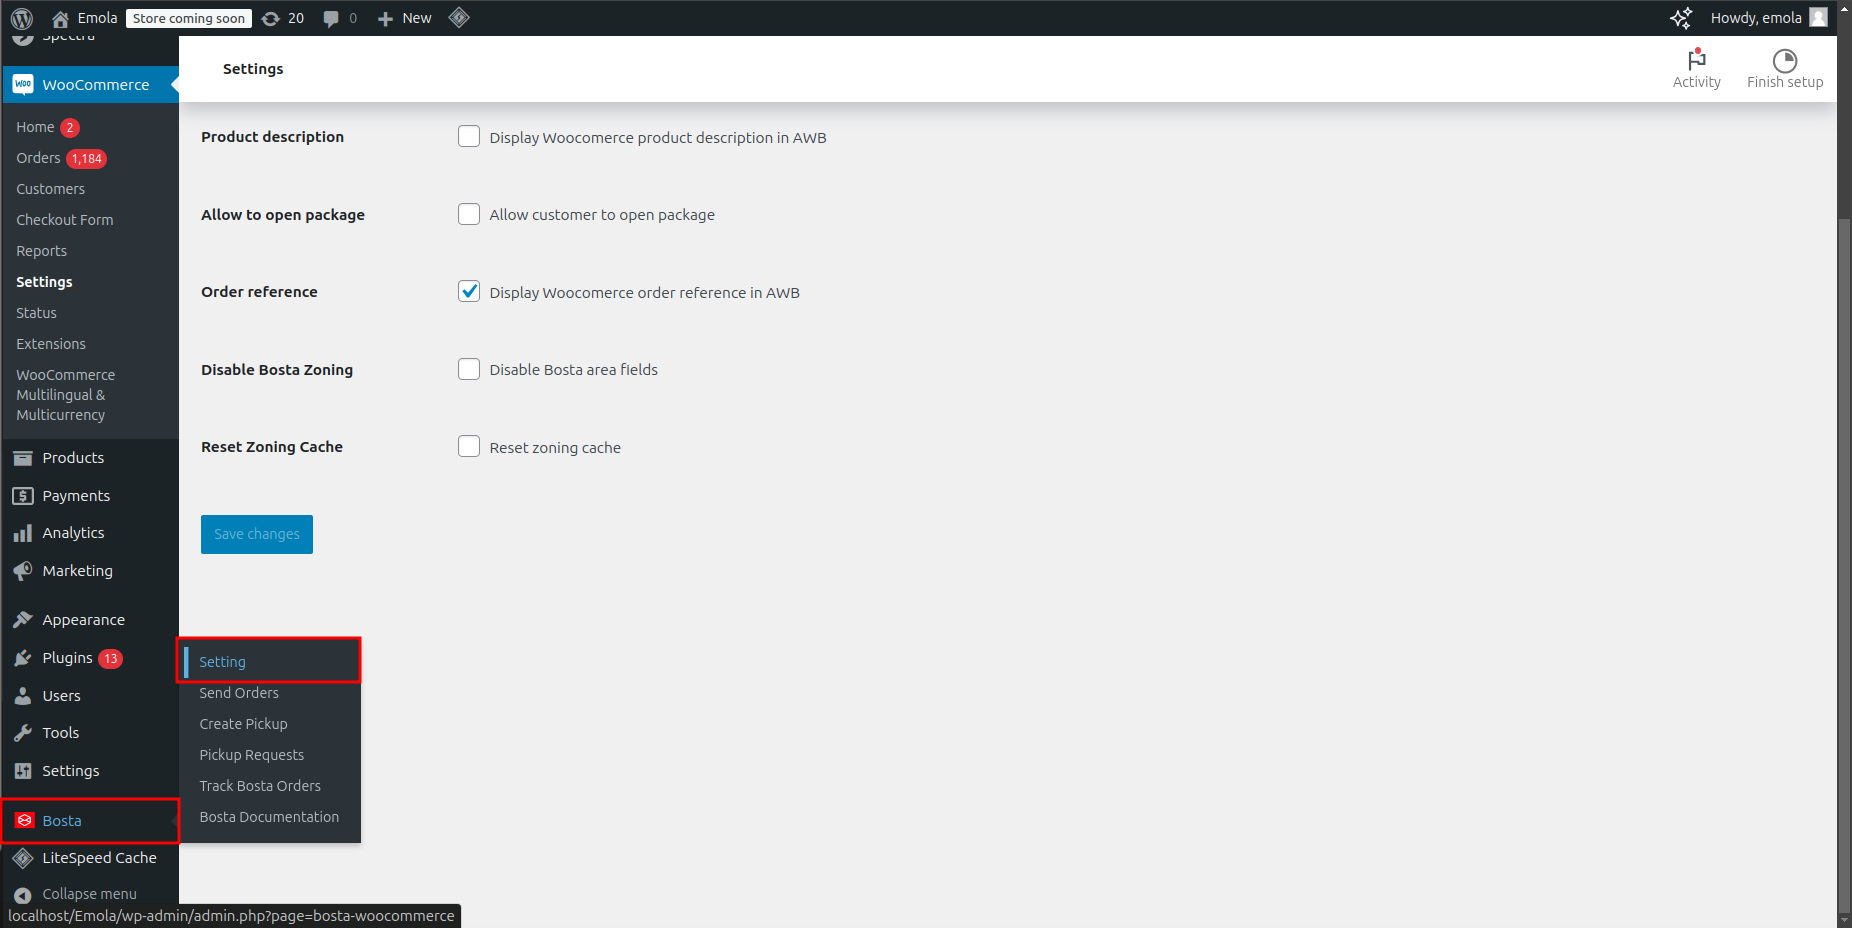
- Navigate to Bosta plugin settings from the sidebar.
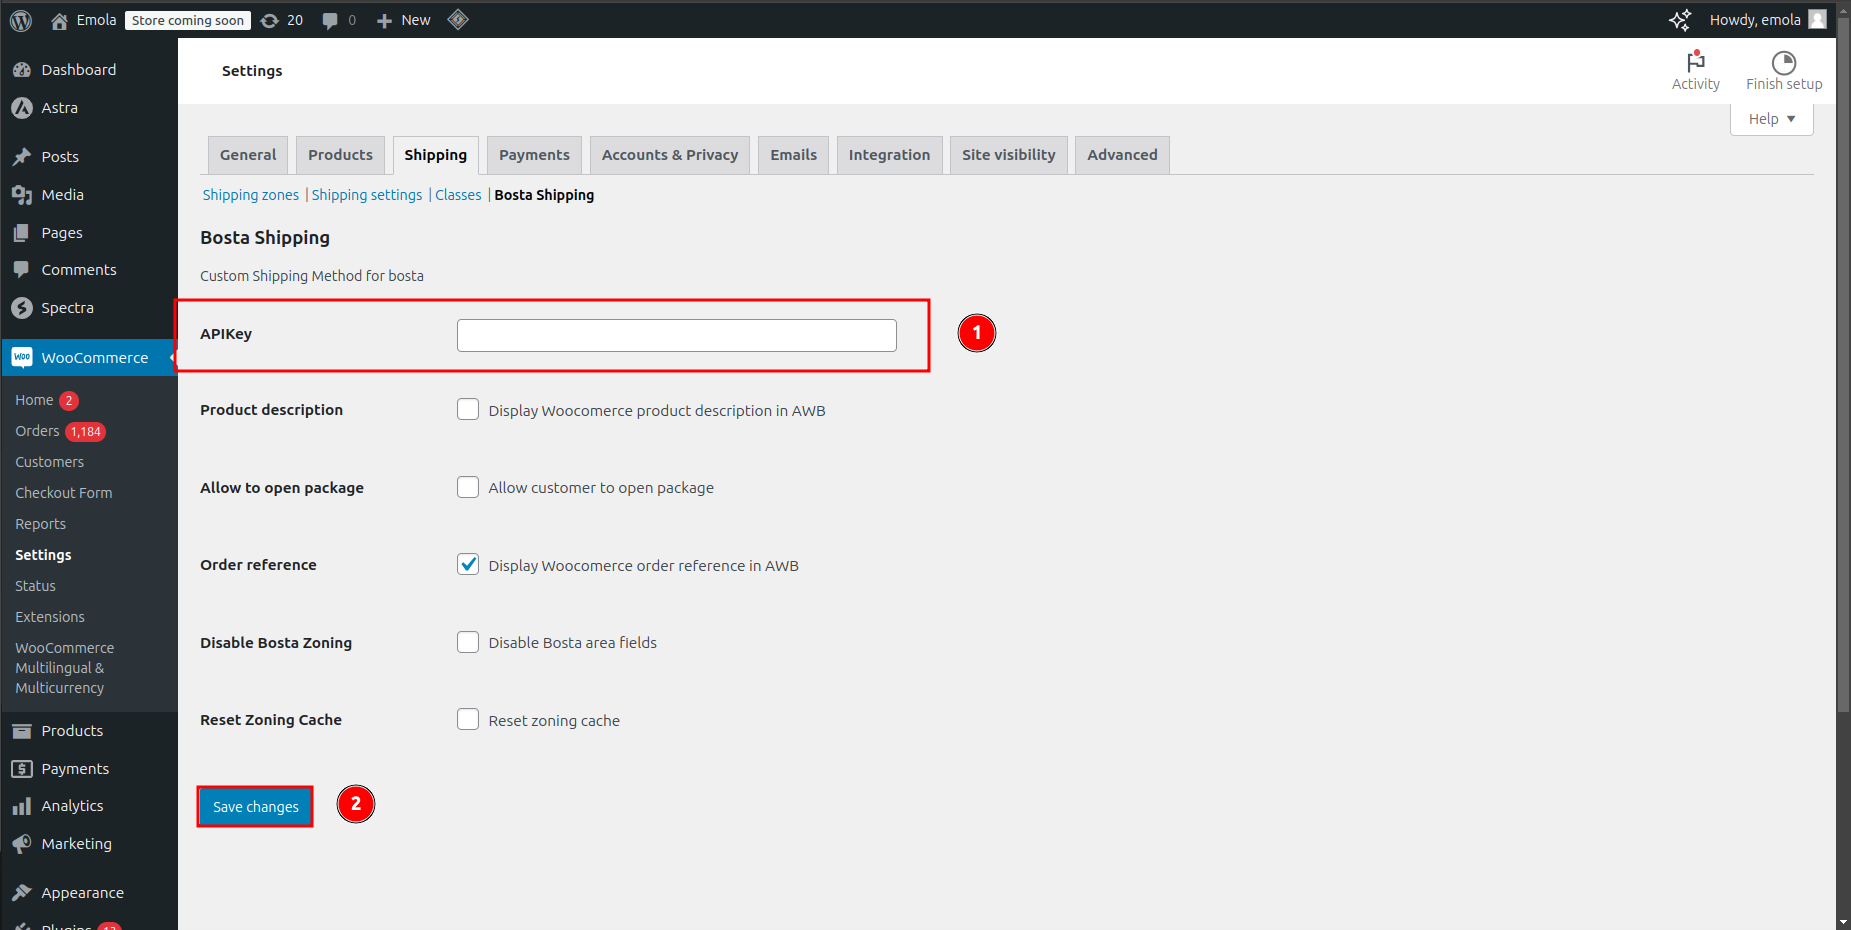
- Copy and paste the API Key you received from Bosta into the settings box.
- Click Save Changes.
Orders
How to Manual Sync Your Normal Orders to Bosta?
- Ensure that all orders include the following fields in the billing details:
- First Name *
- Last Name *
- State / County *
- Area
- Street Address *
- Phone *
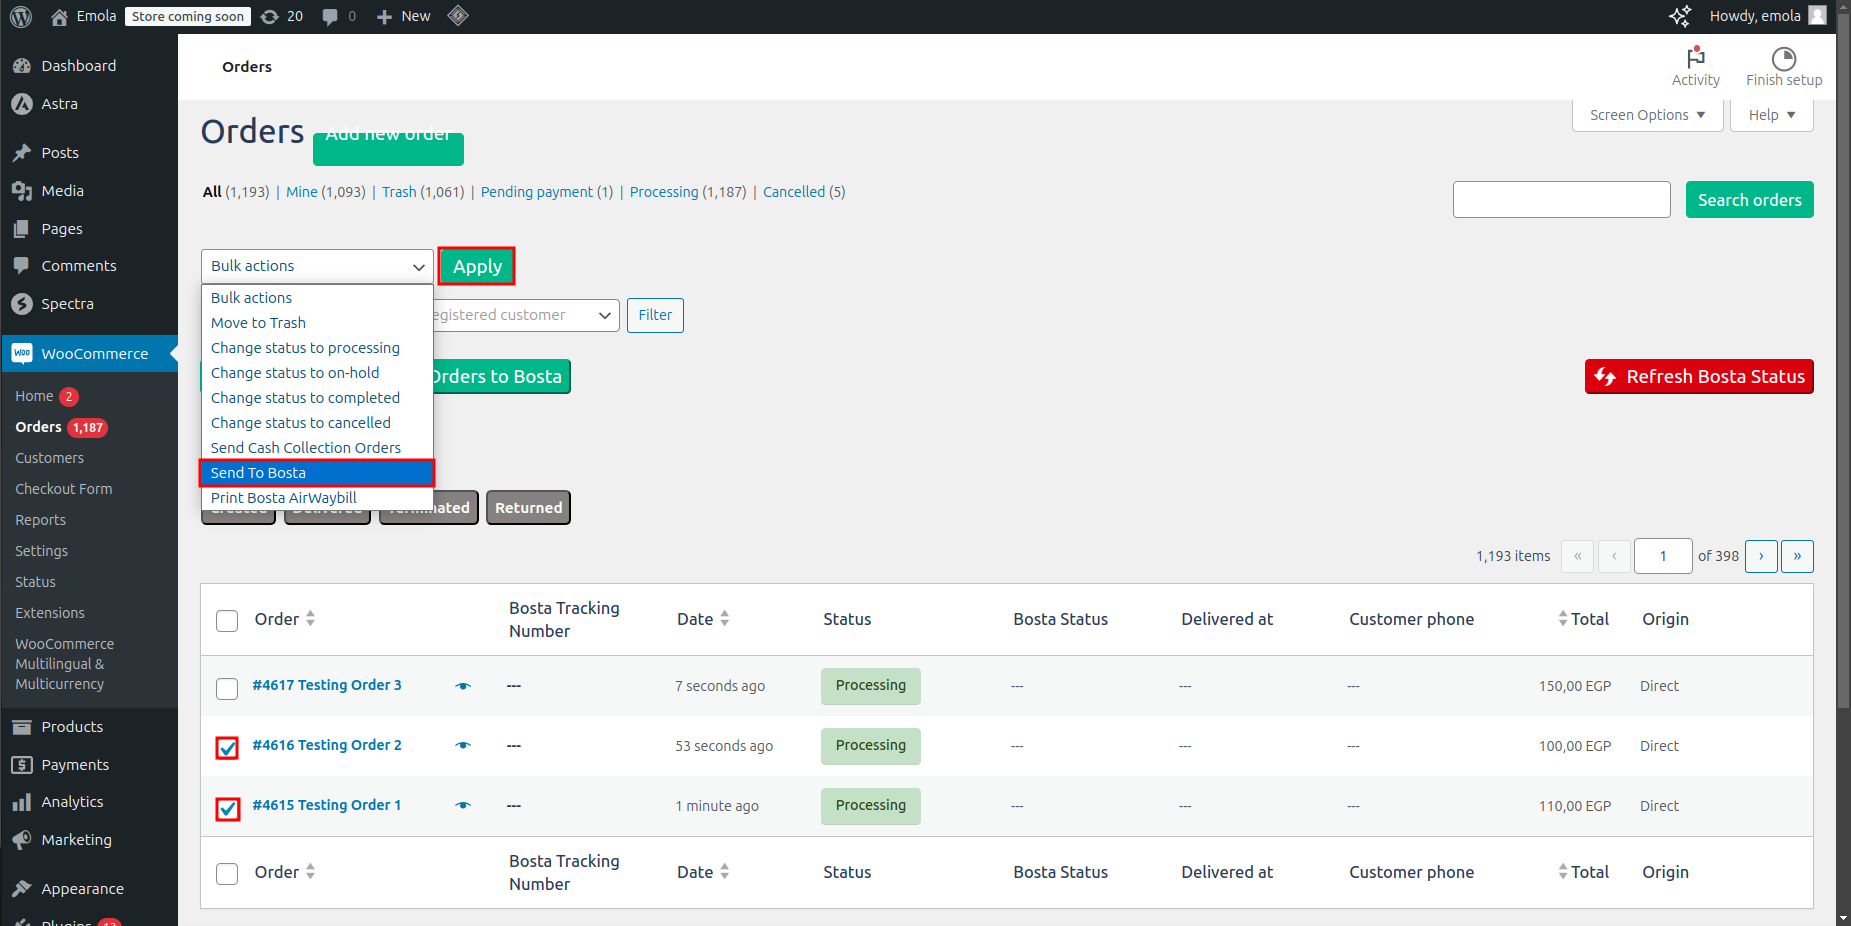
- Sync specific orders to Bosta using bulk actions:
- Select the orders you want to send to Bosta.
- Open the Bulk actions dropdown list.
- Select Send to Bosta.
- Click Apply.
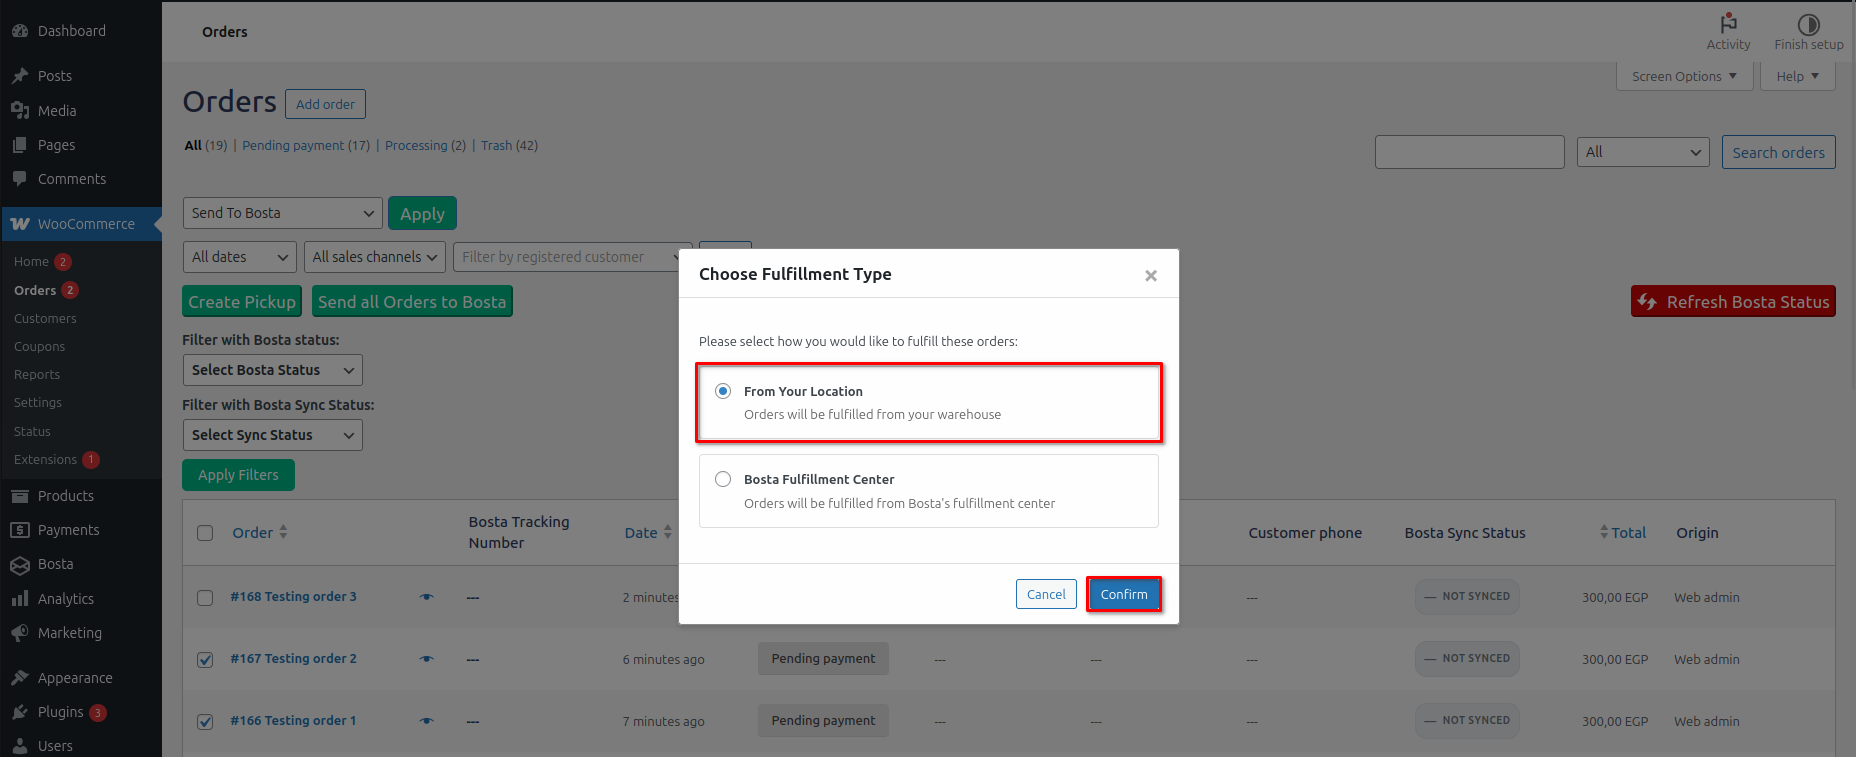
- Choose From Your Location
- Click Confirm.
- Sync all orders on the current page to Bosta:
- Click the Send all Orders to Bosta button.

- Choose From Your Location
- Click Confirm.
- Click the Send all Orders to Bosta button.
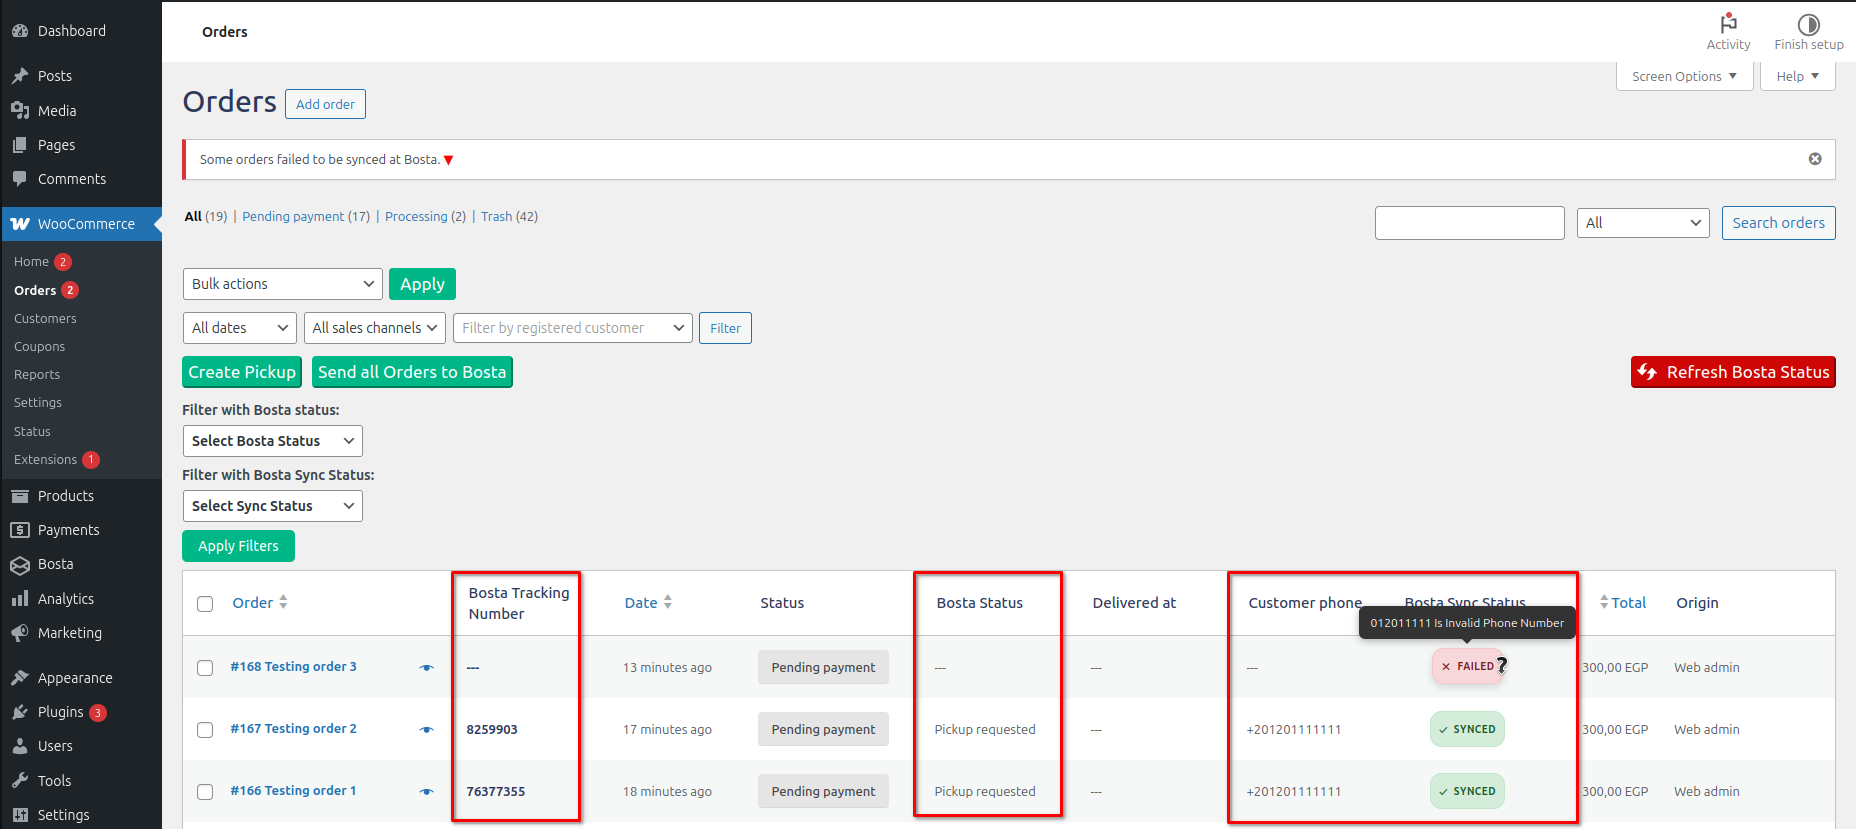
- The presence of tracking numbers and the SYNCED flag means the orders have been synced successfully. If any order have the FAILED flag, hover over the flag to know the failure reason to fix it.
How to Auto Sync Your Normal Orders to Bosta?
Auto Sync means when any order is placed in your store, the order will be synced automatically to your Bosta account without the need to manual sync.
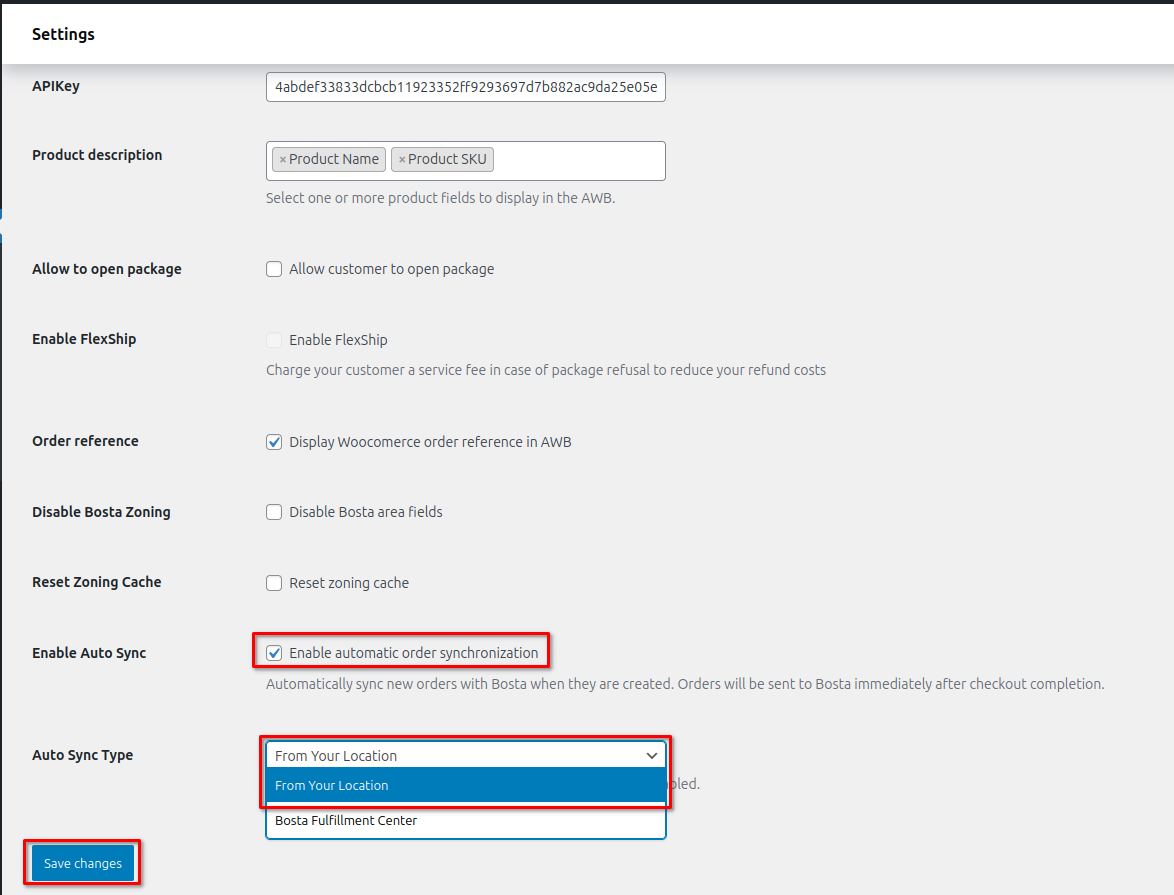
- Navigate to Bosta plugin settings from the sidebar.

- Activate the Auto Sync feature:
- Enable the Auto Sync option
- Select the Auto Sync Type to be From Your Location
- Click Save Changes
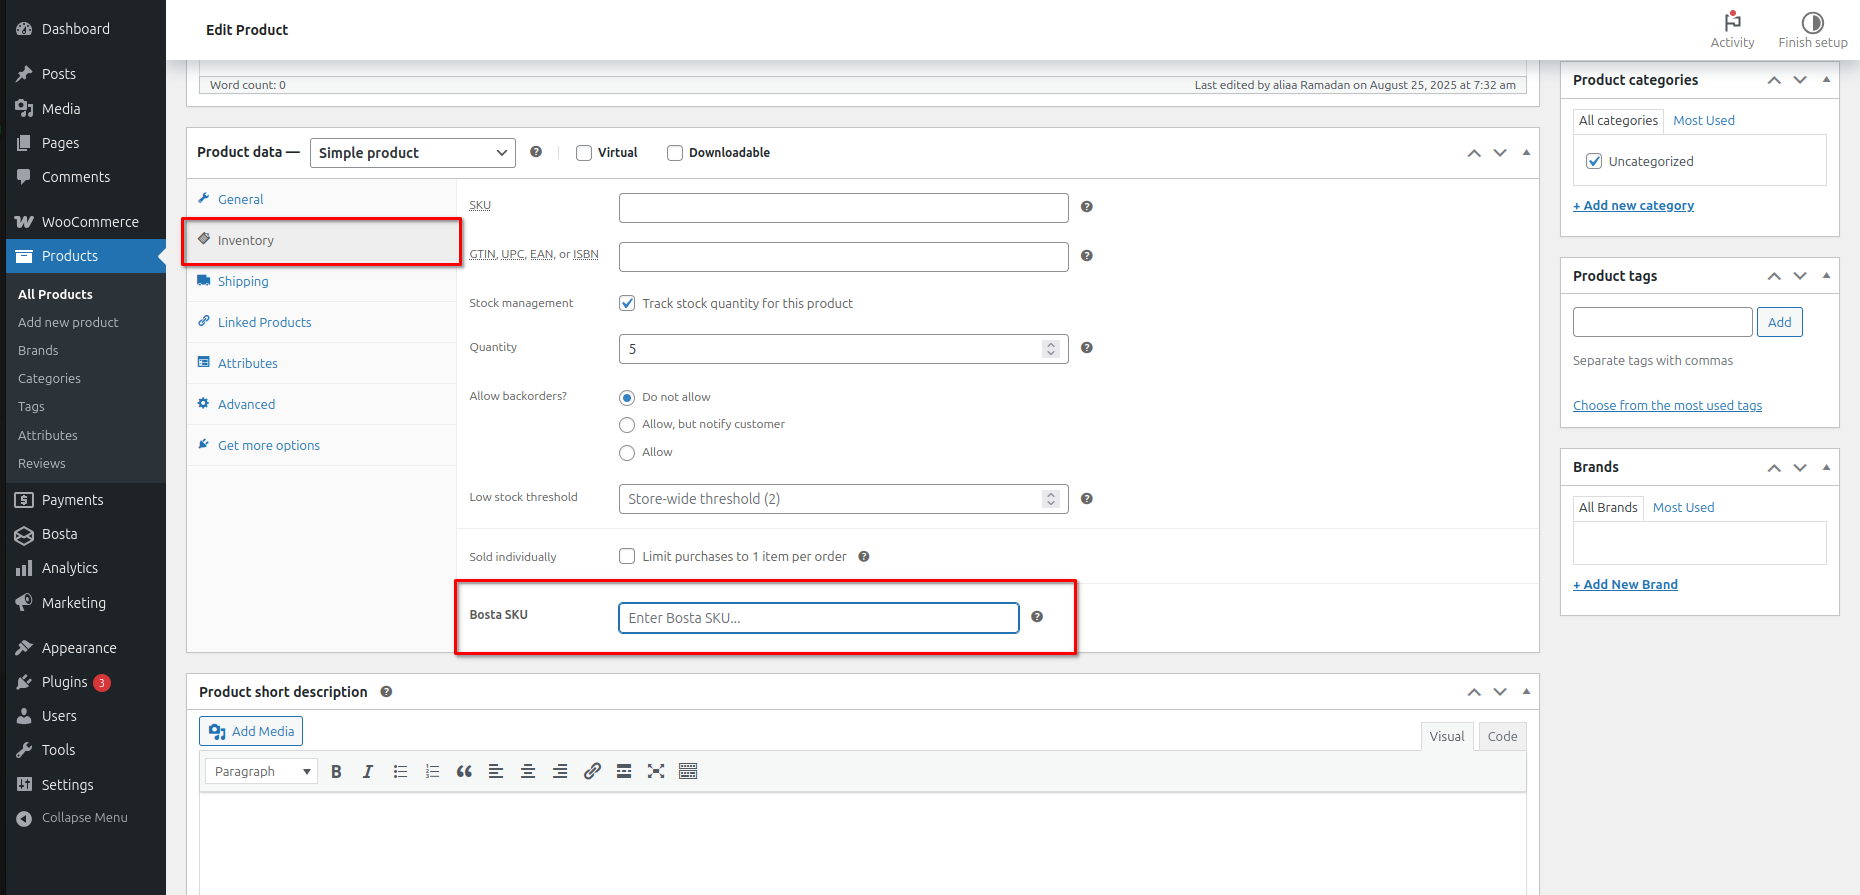
How to connect your WooCommerce products with Bosta fulfillment products?
This section is only for businesses who use Bosta Fulfillment centers
Open your products section in the sidebar and click on each product
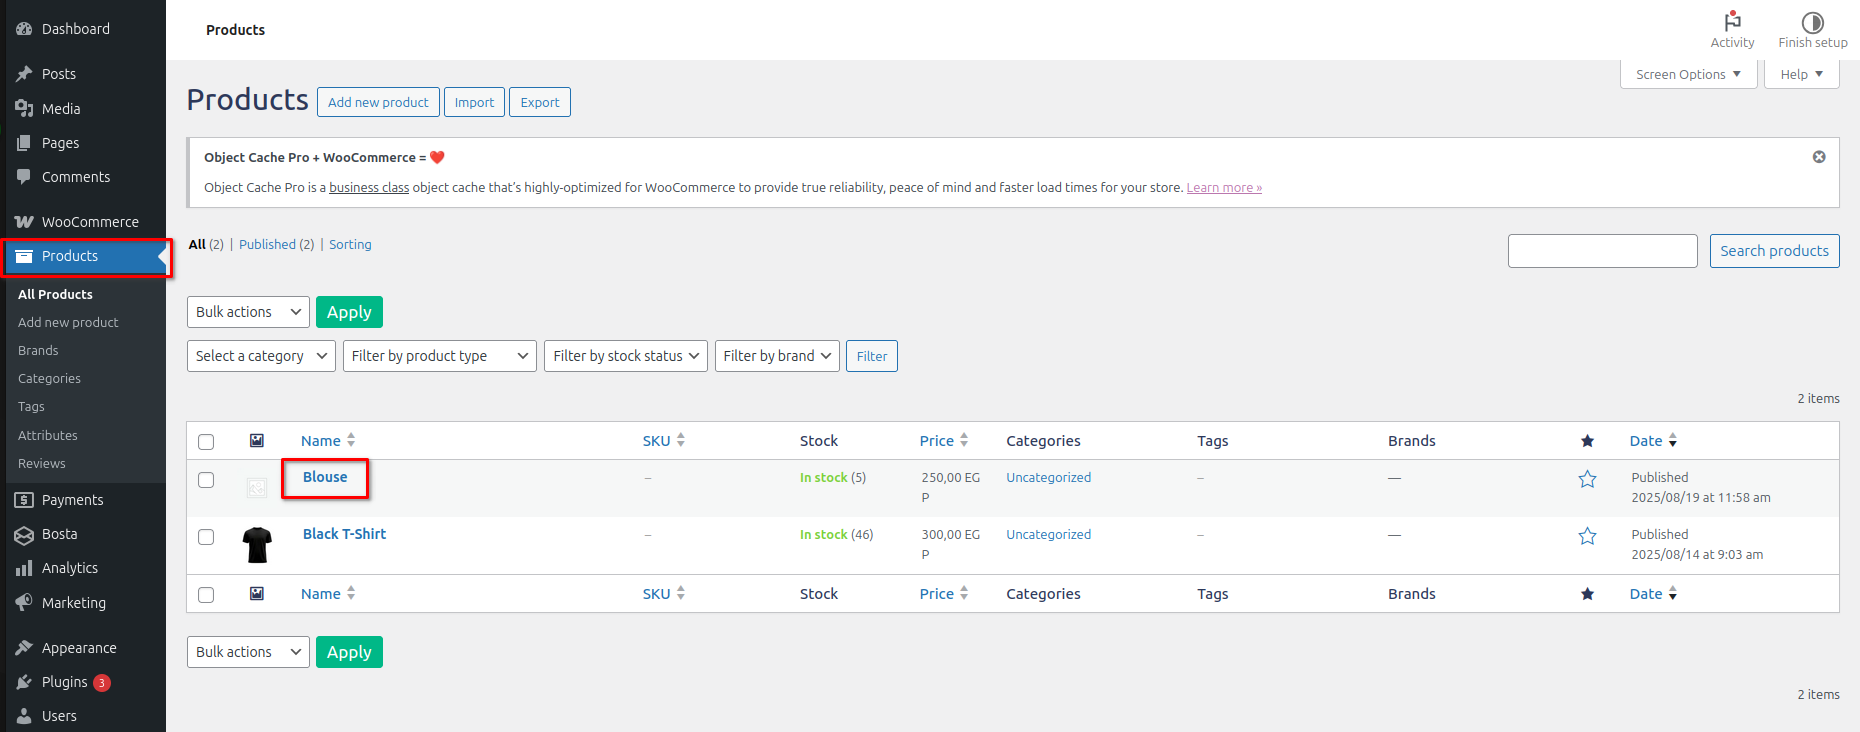
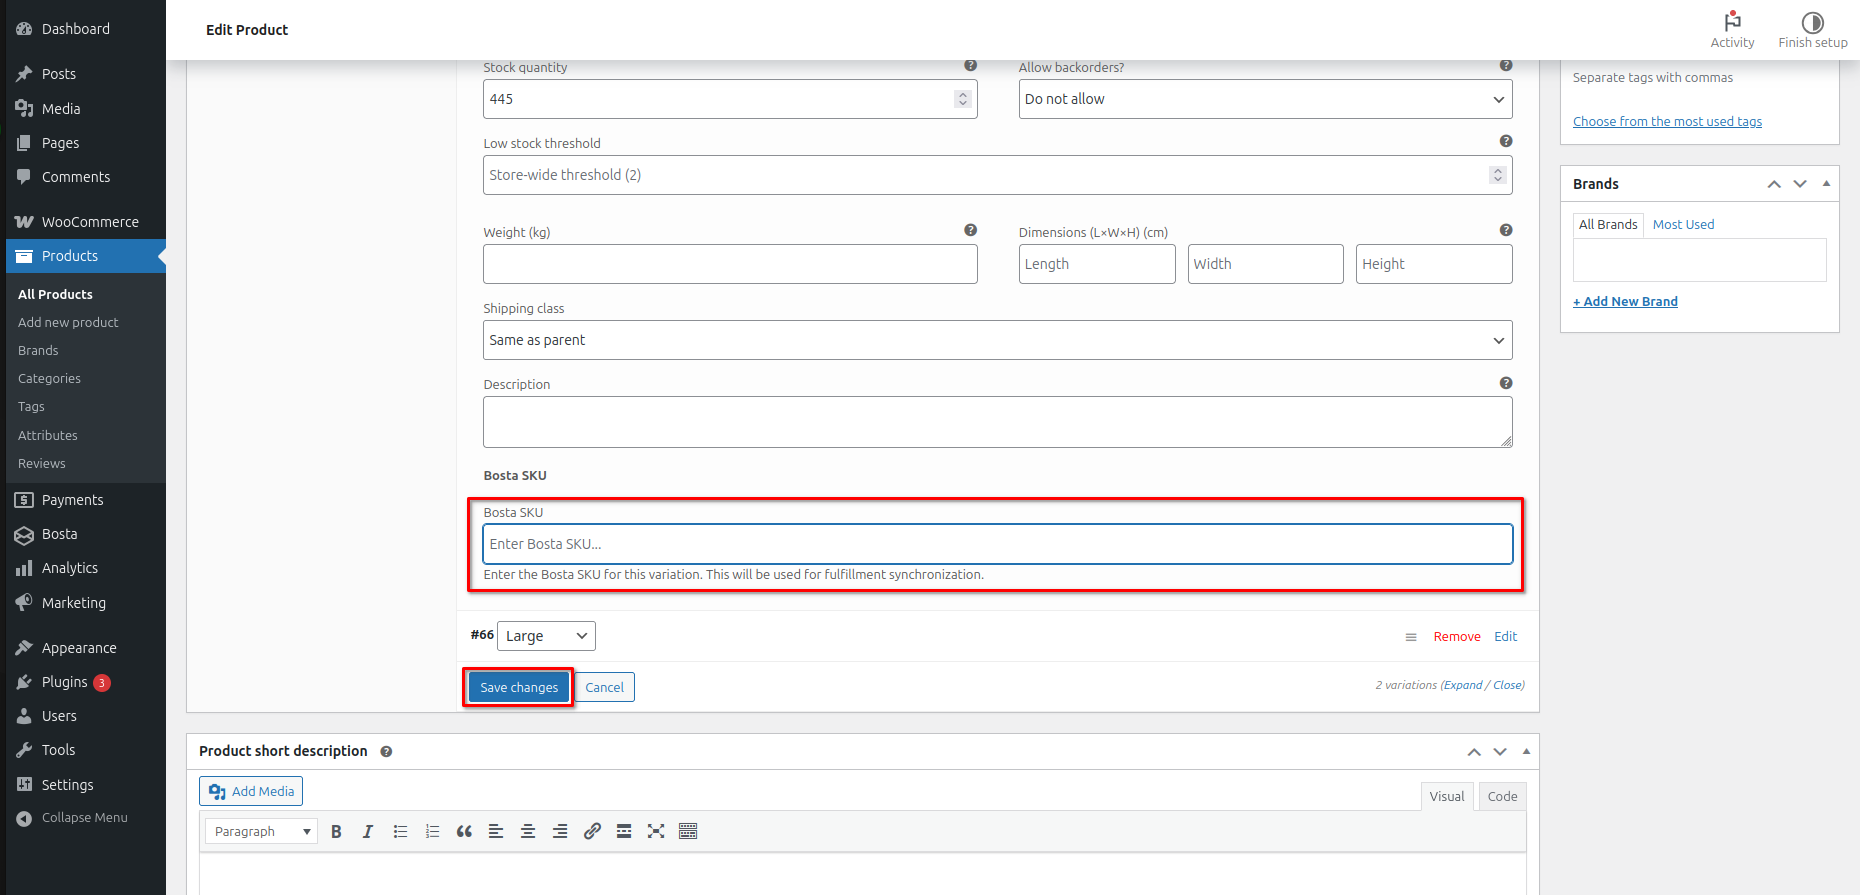
Copy the same product SKU from your bosta account and paste it in the Bosta SKU field
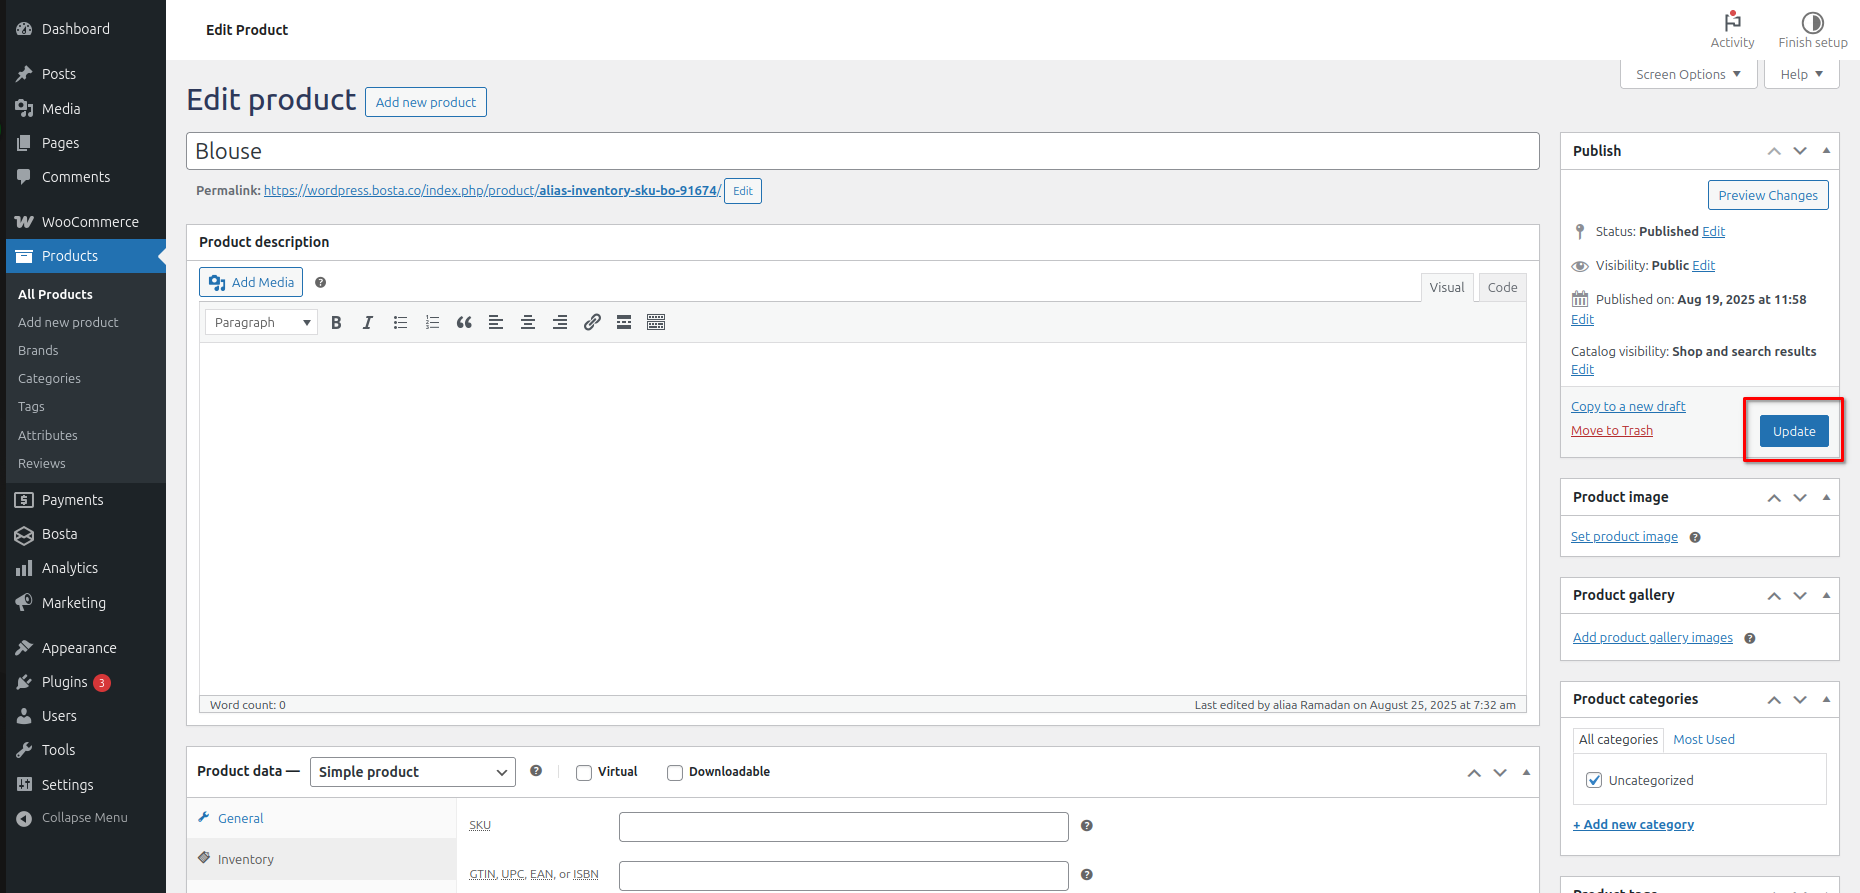
Click on the Update button
Note: If your product has variants, make sure to caopy the SKU from the variant at Bosta and paste it into the same variant in WooCommerce, not the main product.

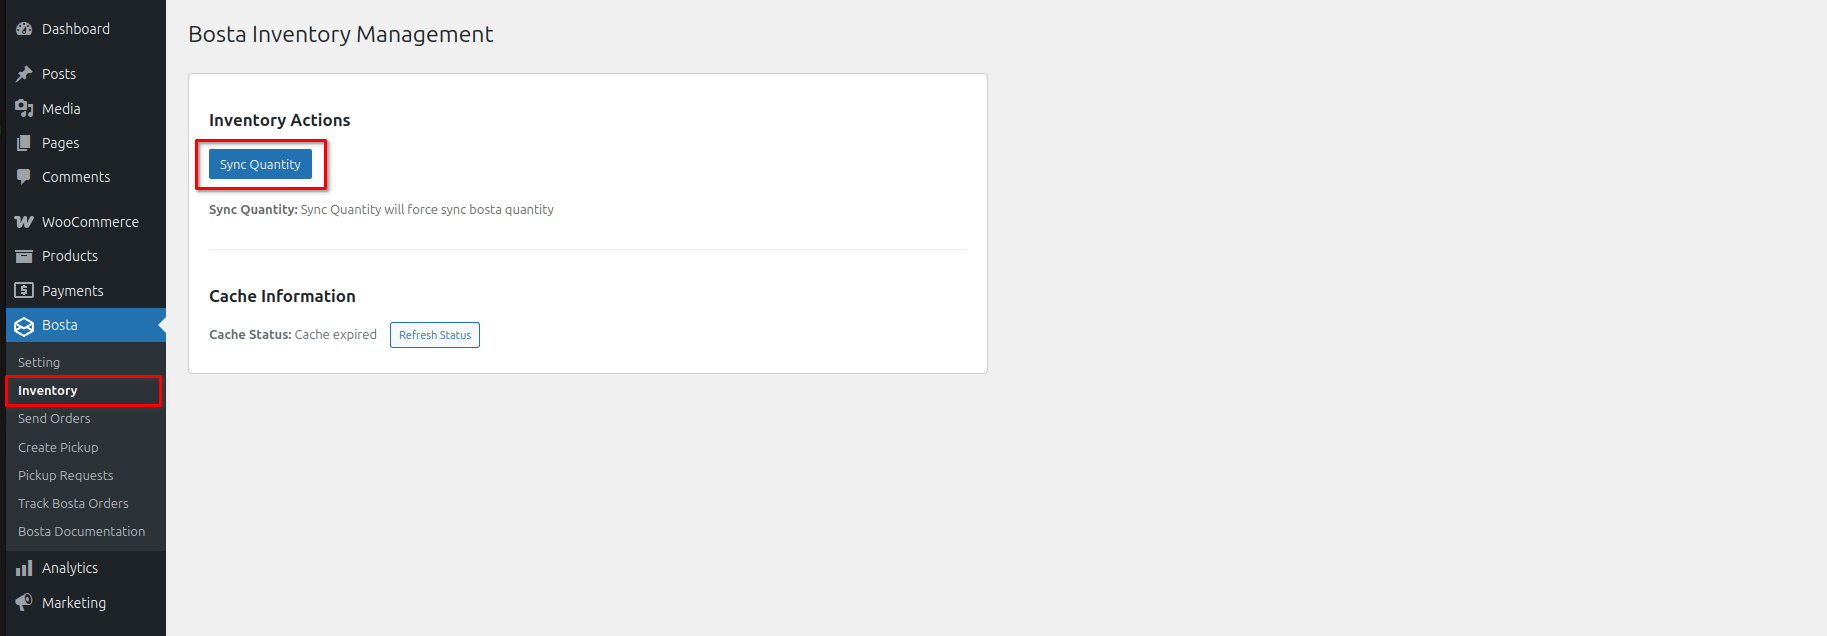
Update the quantities of your products in WooCommerce based on the ones at Bosta:
- Navigate to the Inventory tab
- Click on Sync Quantities button
How to Manual Sync Your Fulfillment Orders to Bosta?
This section is only for businesses who use Bosta Fulfillment centers
- Ensure that all orders include the following fields in the billing details:
- First Name *
- Last Name *
- State / County *
- Area
- Street Address *
- Phone *
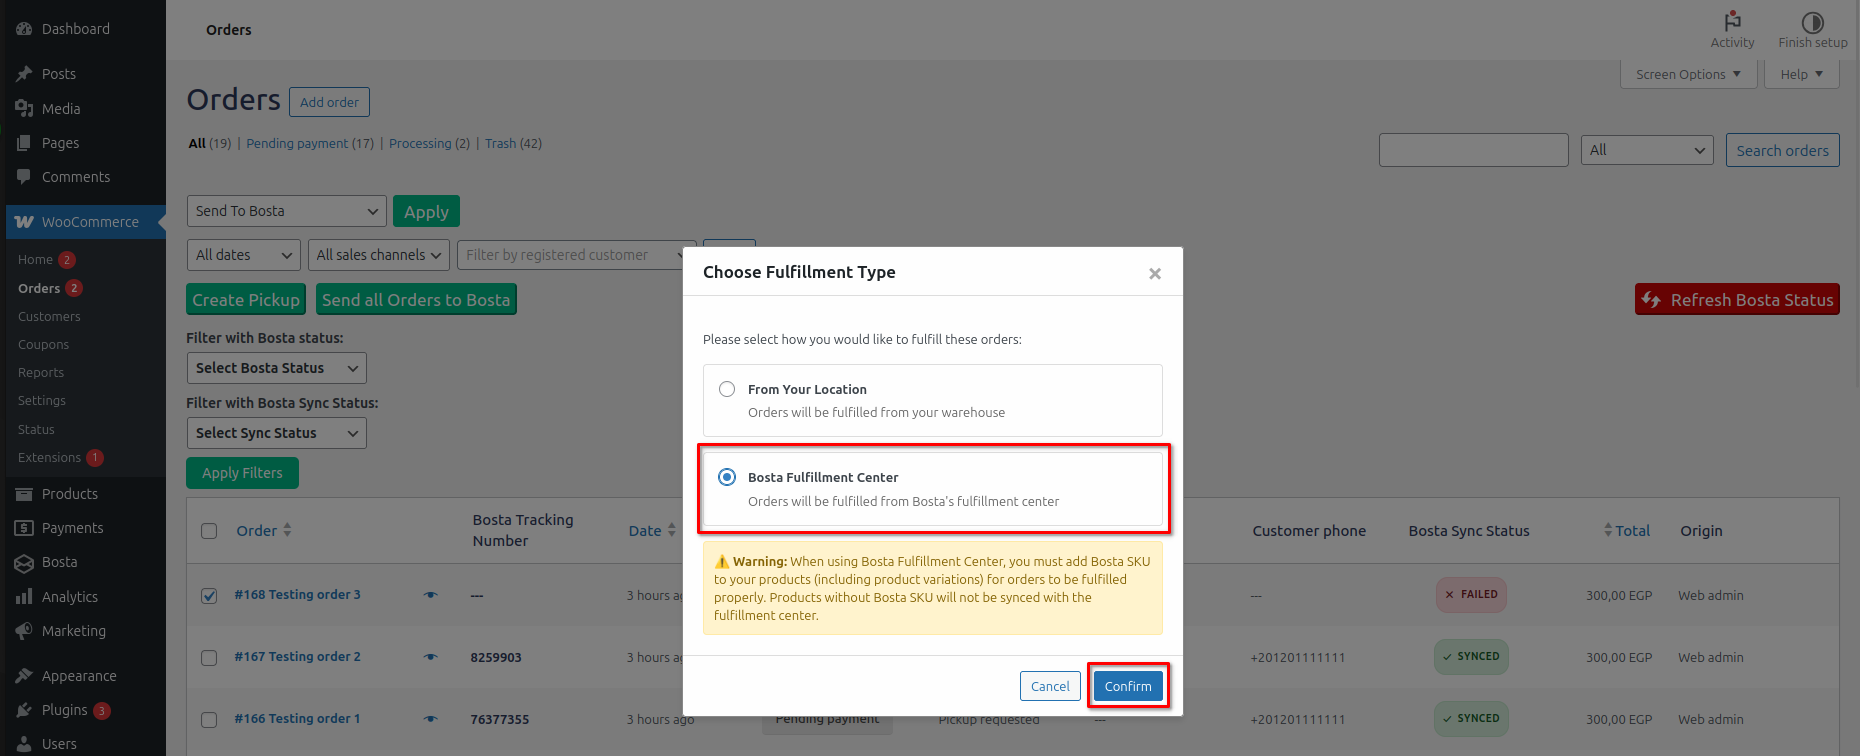
- Sync specific orders to Bosta using bulk actions:
- Select the orders you want to send to Bosta.
- Open the Bulk actions dropdown list.
- Select Send to Bosta.
- Click Apply.
- Choose Bosta Fulfillment Center
- Click Confirm.
- Sync all orders on the current page to Bosta:
- Click the Send all Orders to Bosta button.
- Choose Bosta Fulfillment Center
- Click Confirm.
- Click the Send all Orders to Bosta button.
- The presence of tracking numbers and the SYNCED flag means the orders have been synced successfully. If any order have the FAILED flag, hover over the flag to know the failure reason to fix it.
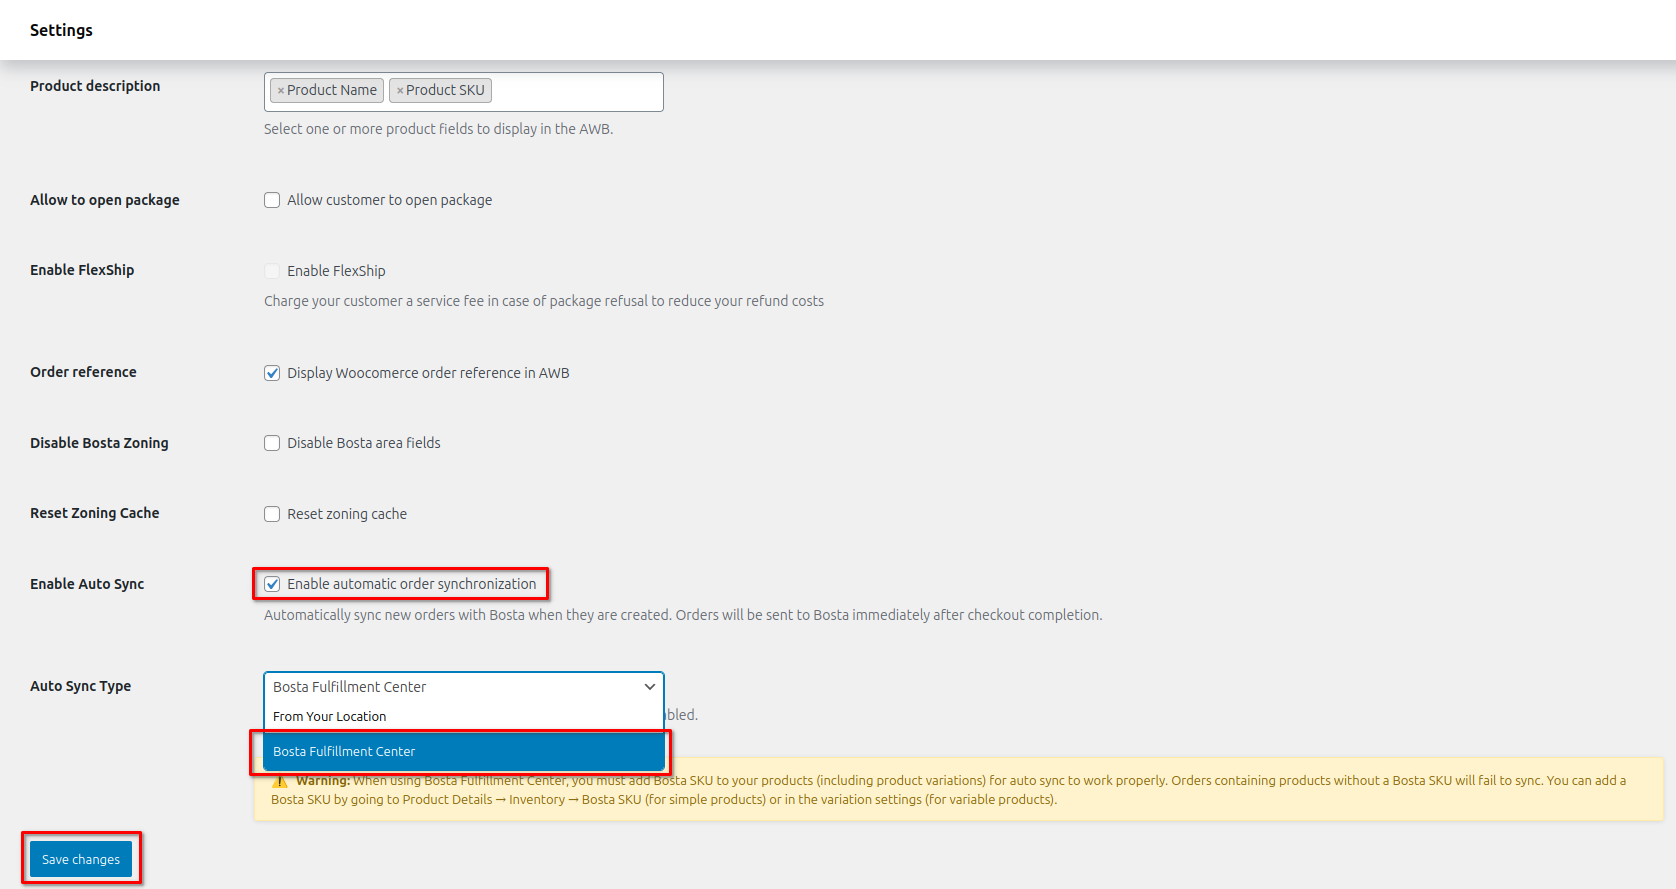
How to Auto Sync Your Fulfillment Orders to Bosta?
This section is only for businesses who use Bosta Fulfillment centers.
Auto Sync means when any fulfillment order is placed in your store, the order will be synced automatically to your Bosta account without the need to manual sync.
- Navigate to Bosta plugin settings from the sidebar.
- Activate the Auto Sync feature:
- Enable the Auto Sync option
- Select the Auto Sync Type to be Bosta Fulfillment Center
- Click Save Changes
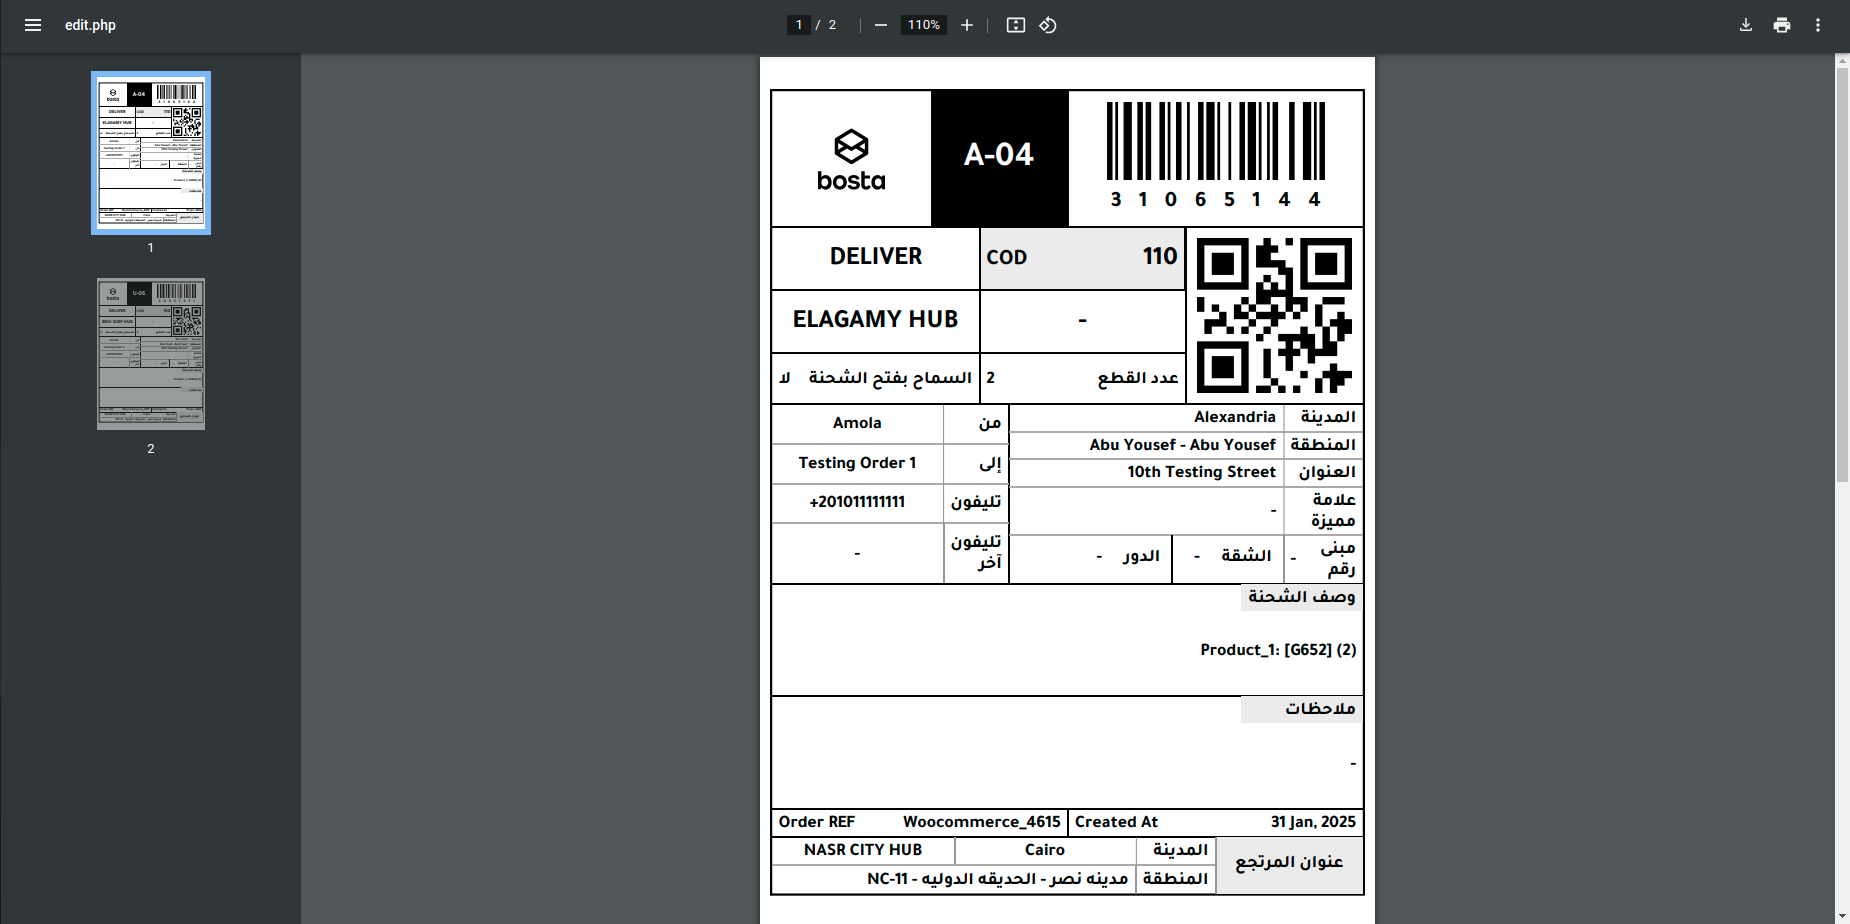
How to Print Orders' Airway Bill?
- Select the orders for which you want to print the airway bill.
- Open the Bulk actions dropdown list.
- Select Print Bosta Airway Bill.
- Click Apply.
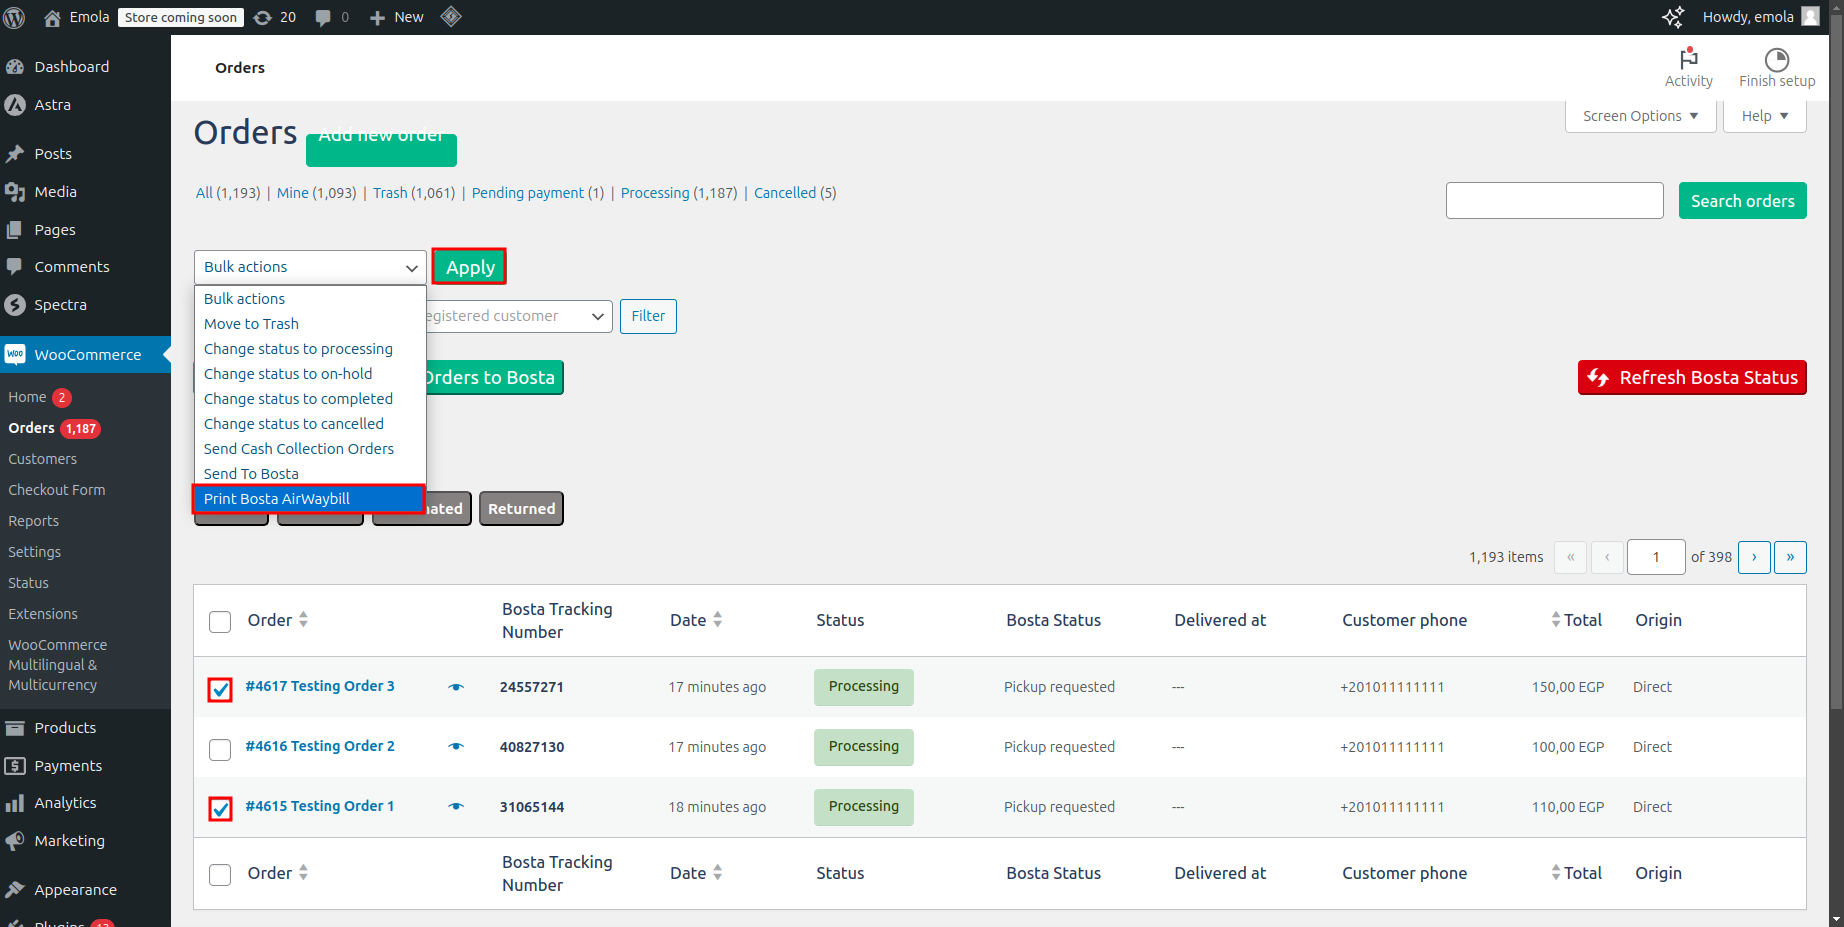
- A PDF file will open with the airway bills ready to be printed 🧾
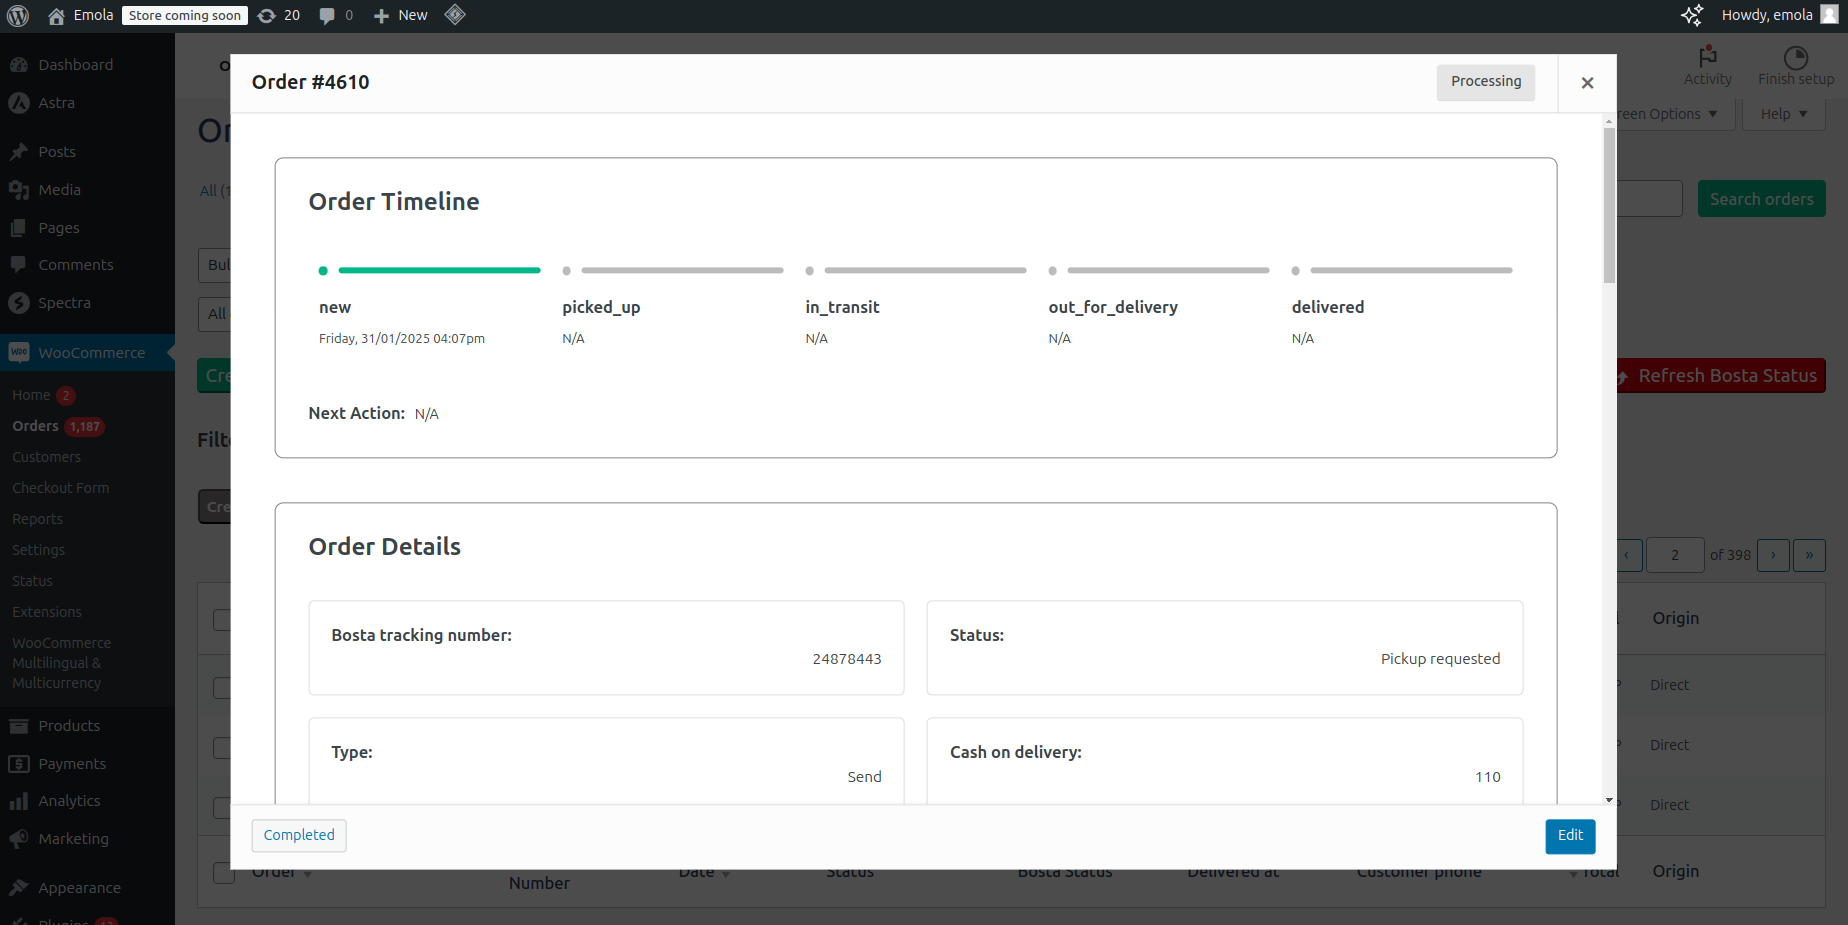
How to Preview Order Details?
- Click the preview icon beside the order.
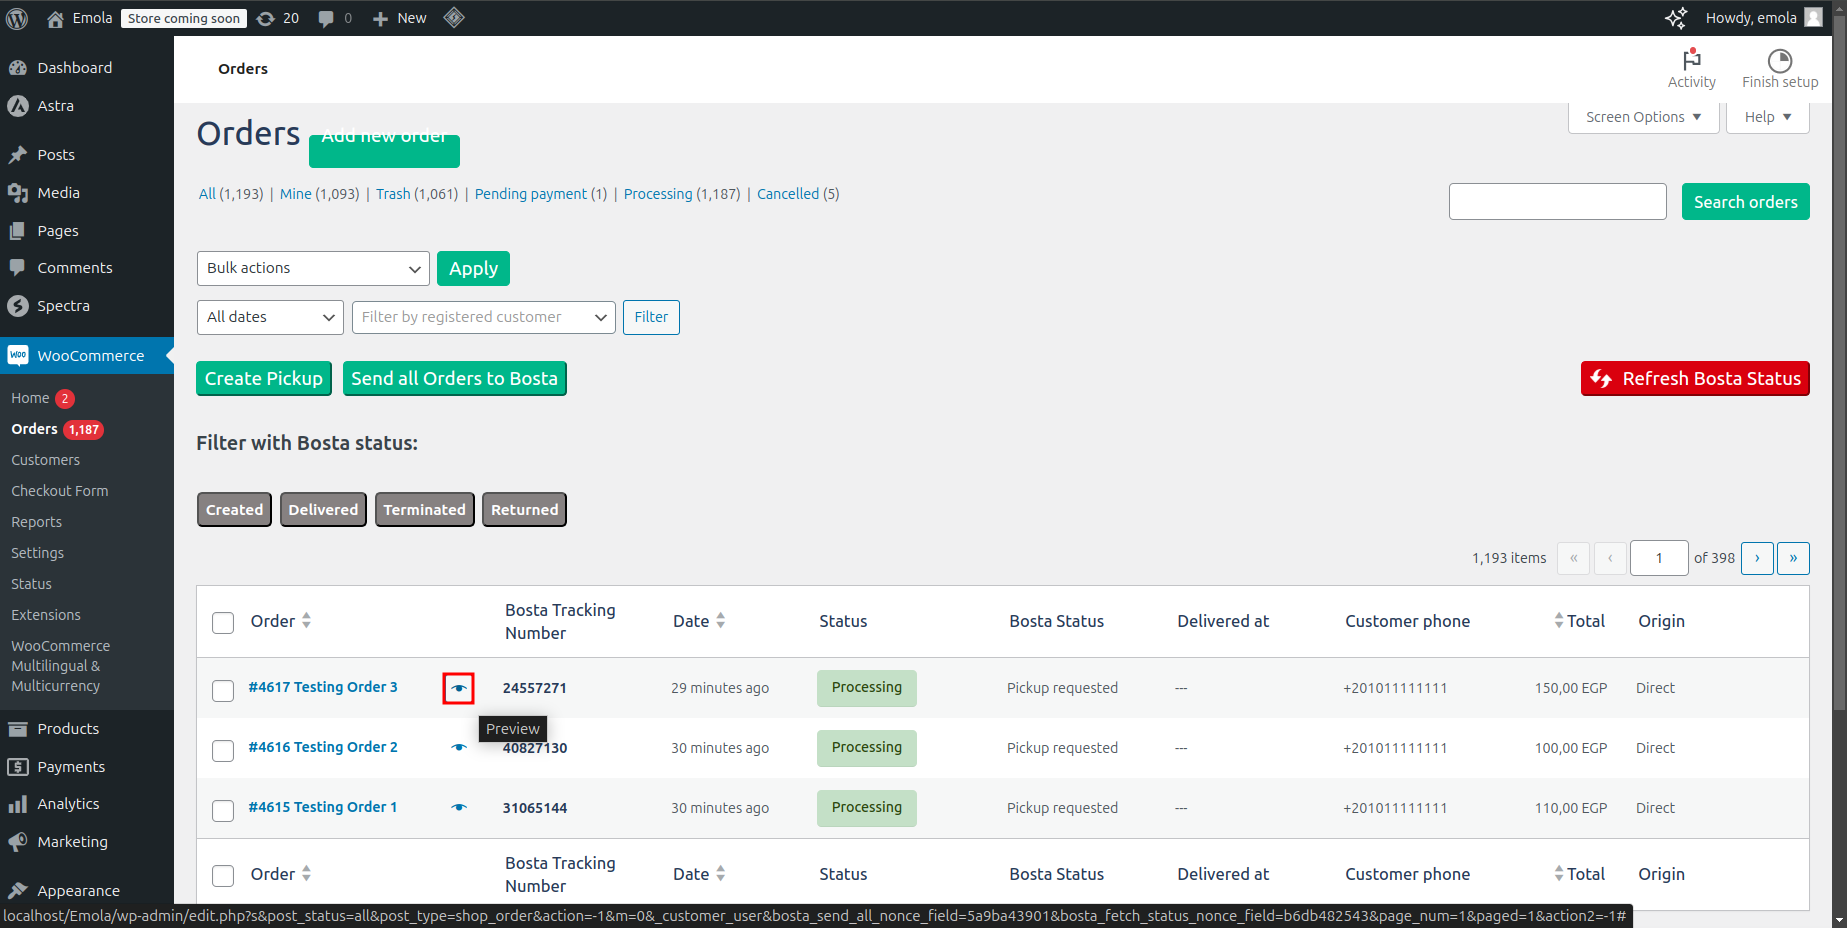
- A window with the order details from Bosta will open.
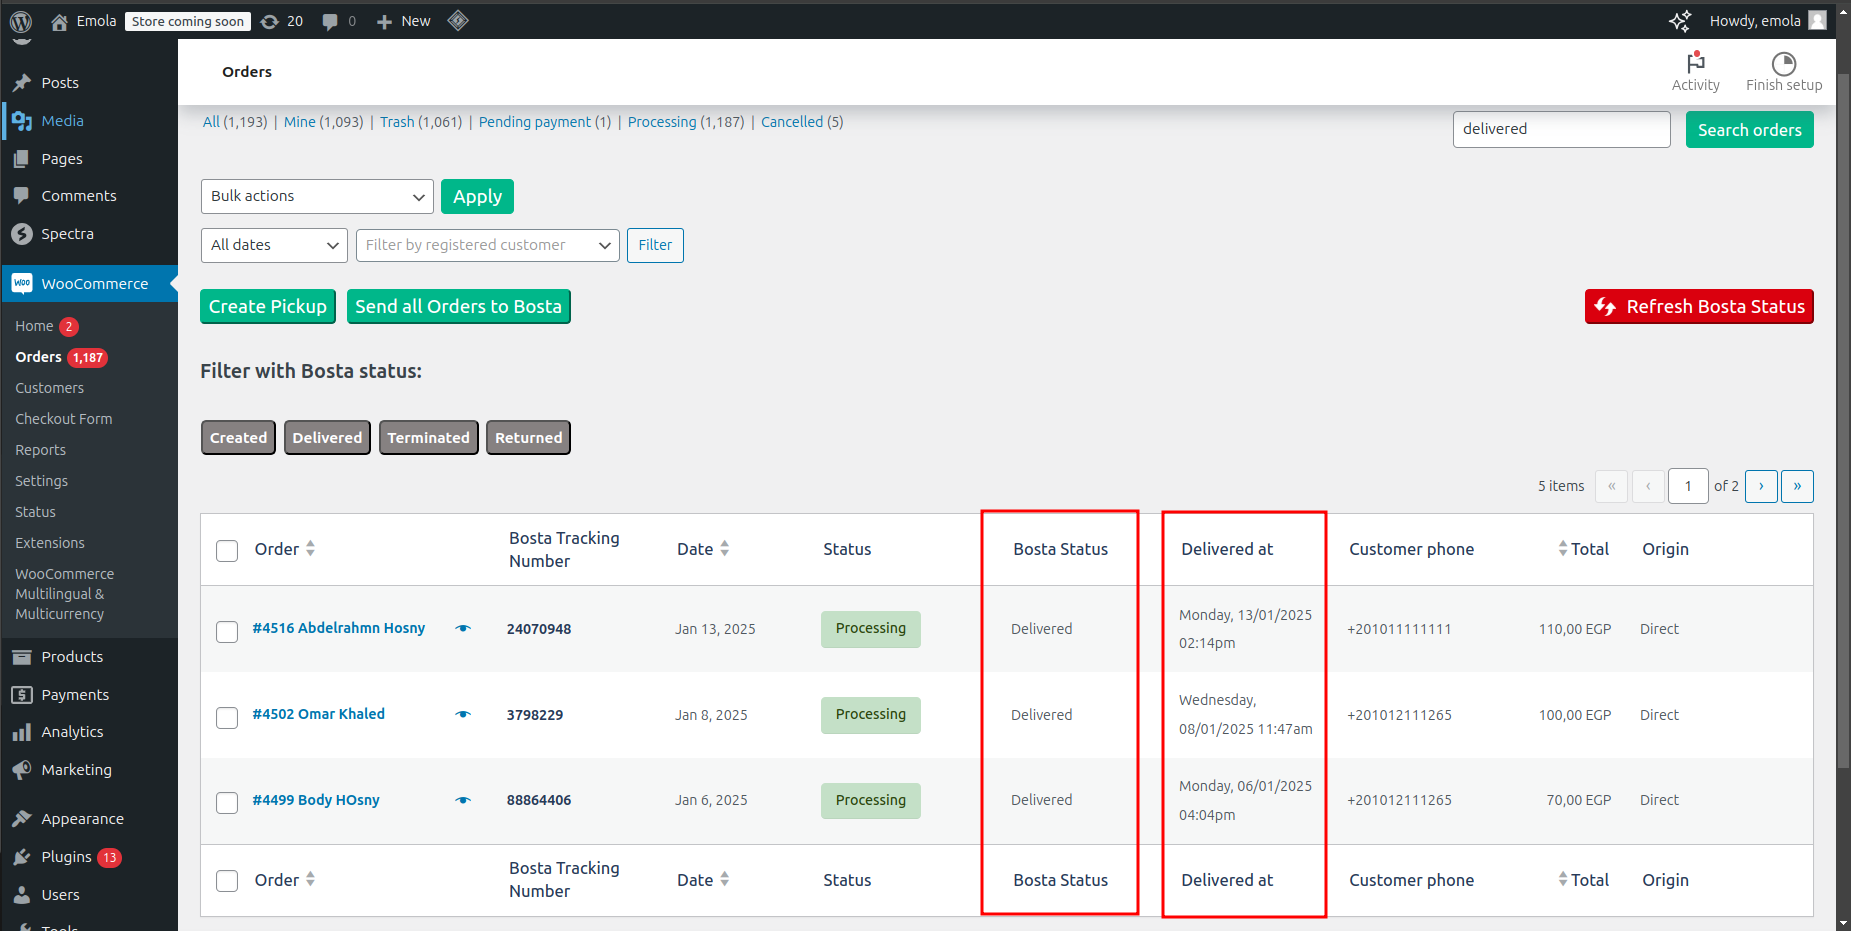
How to Get Orders' Latest Status?
- Click the Refresh Bosta Status button.
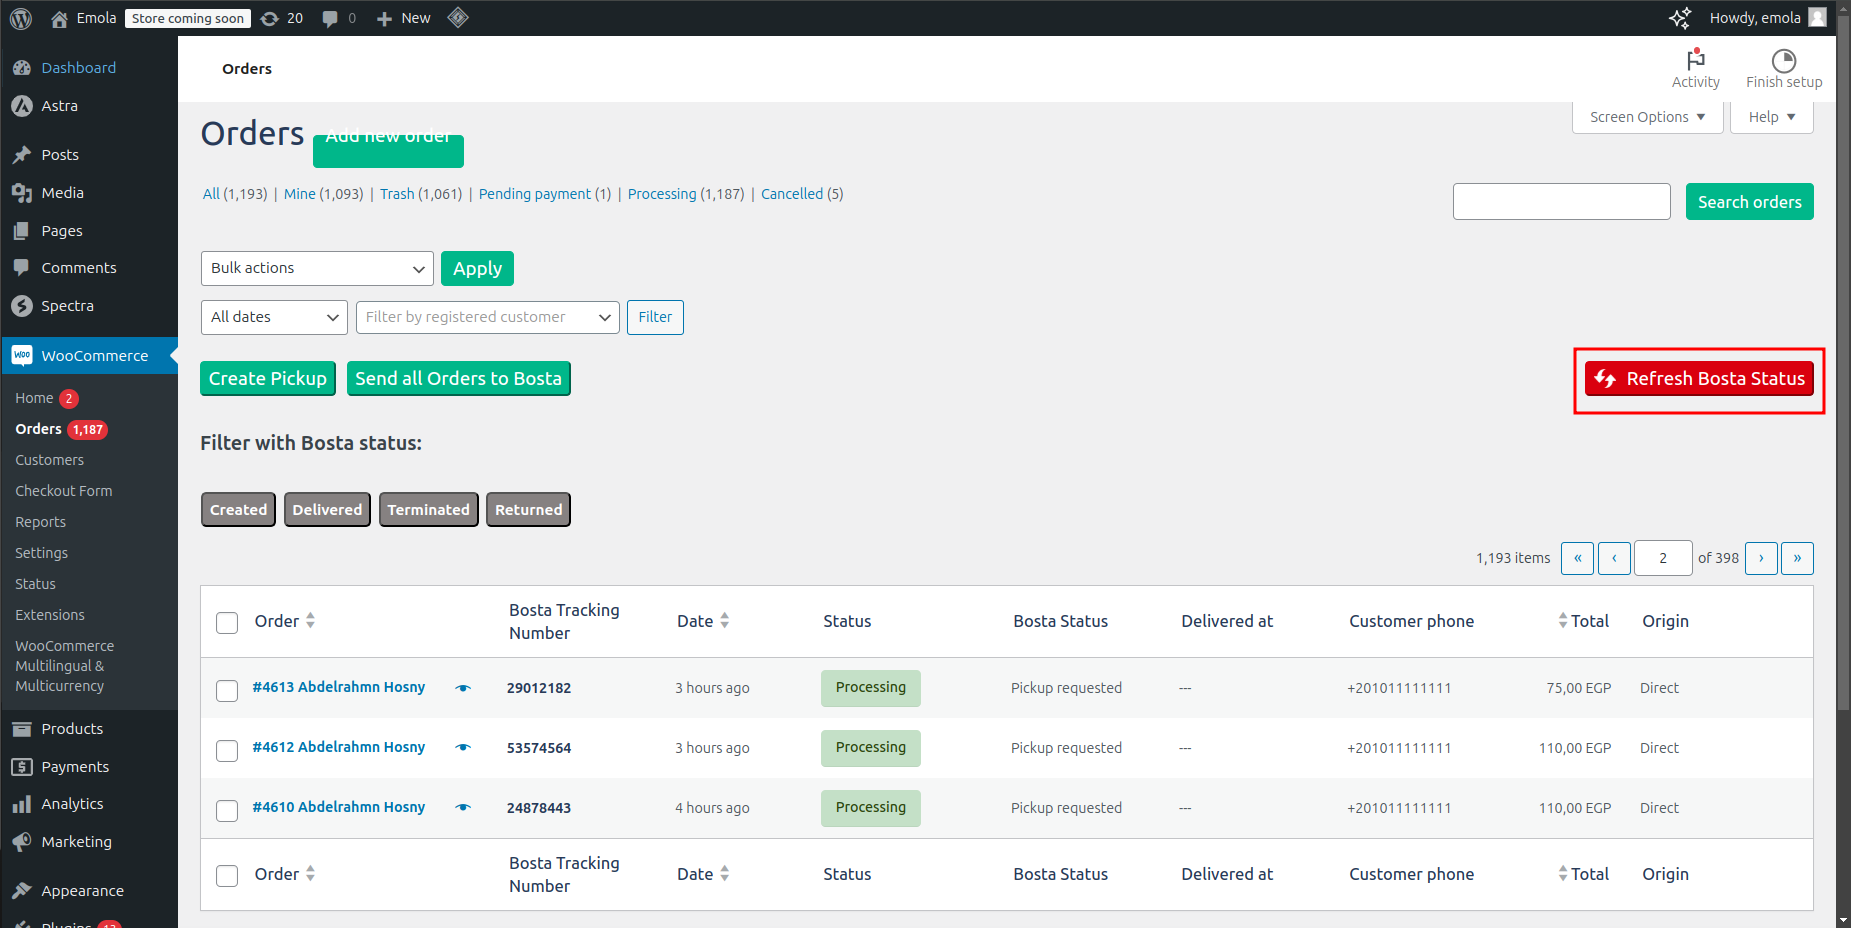
- The latest status of the orders will be reflected in the table.
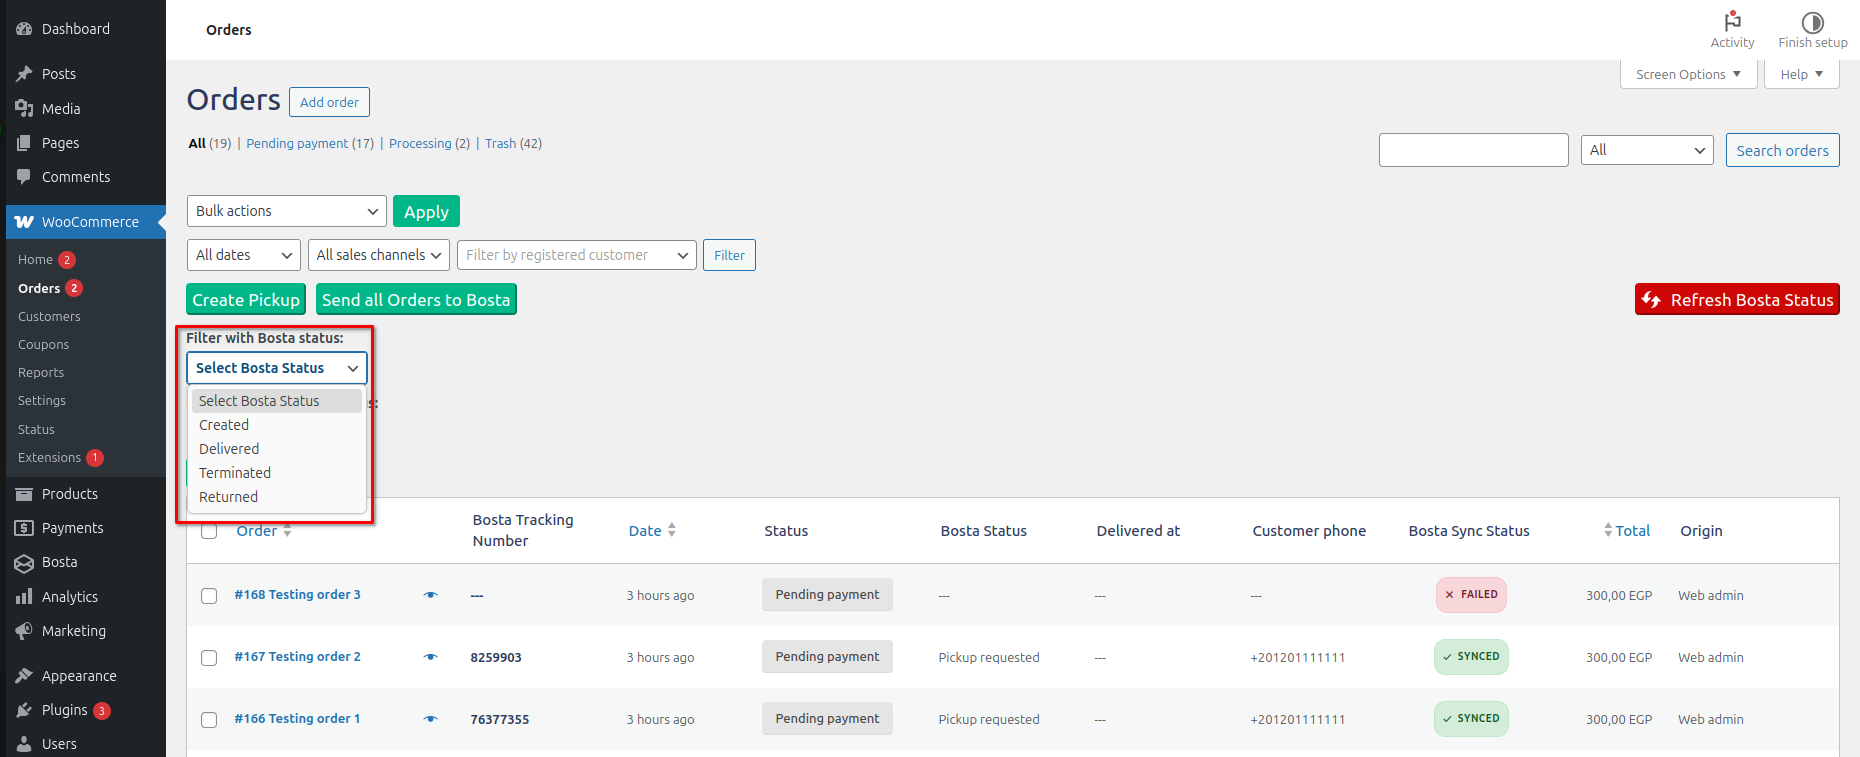
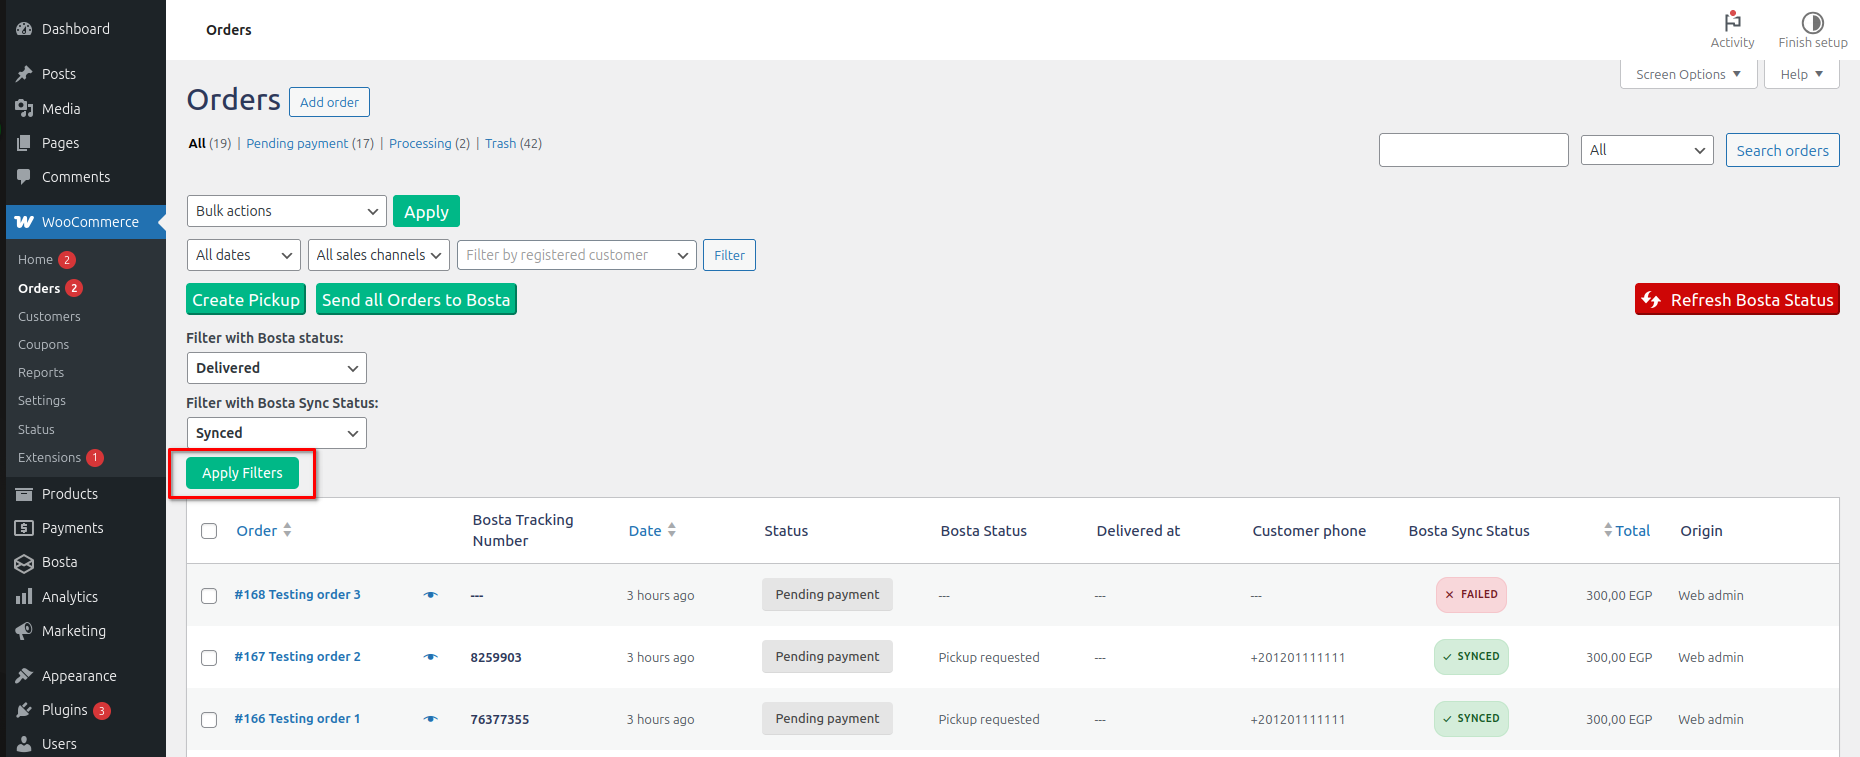
How to Filter the Orders?
Using Filter with Bosta status buttons.
Using Filter with Bosta Sync Status buttons.
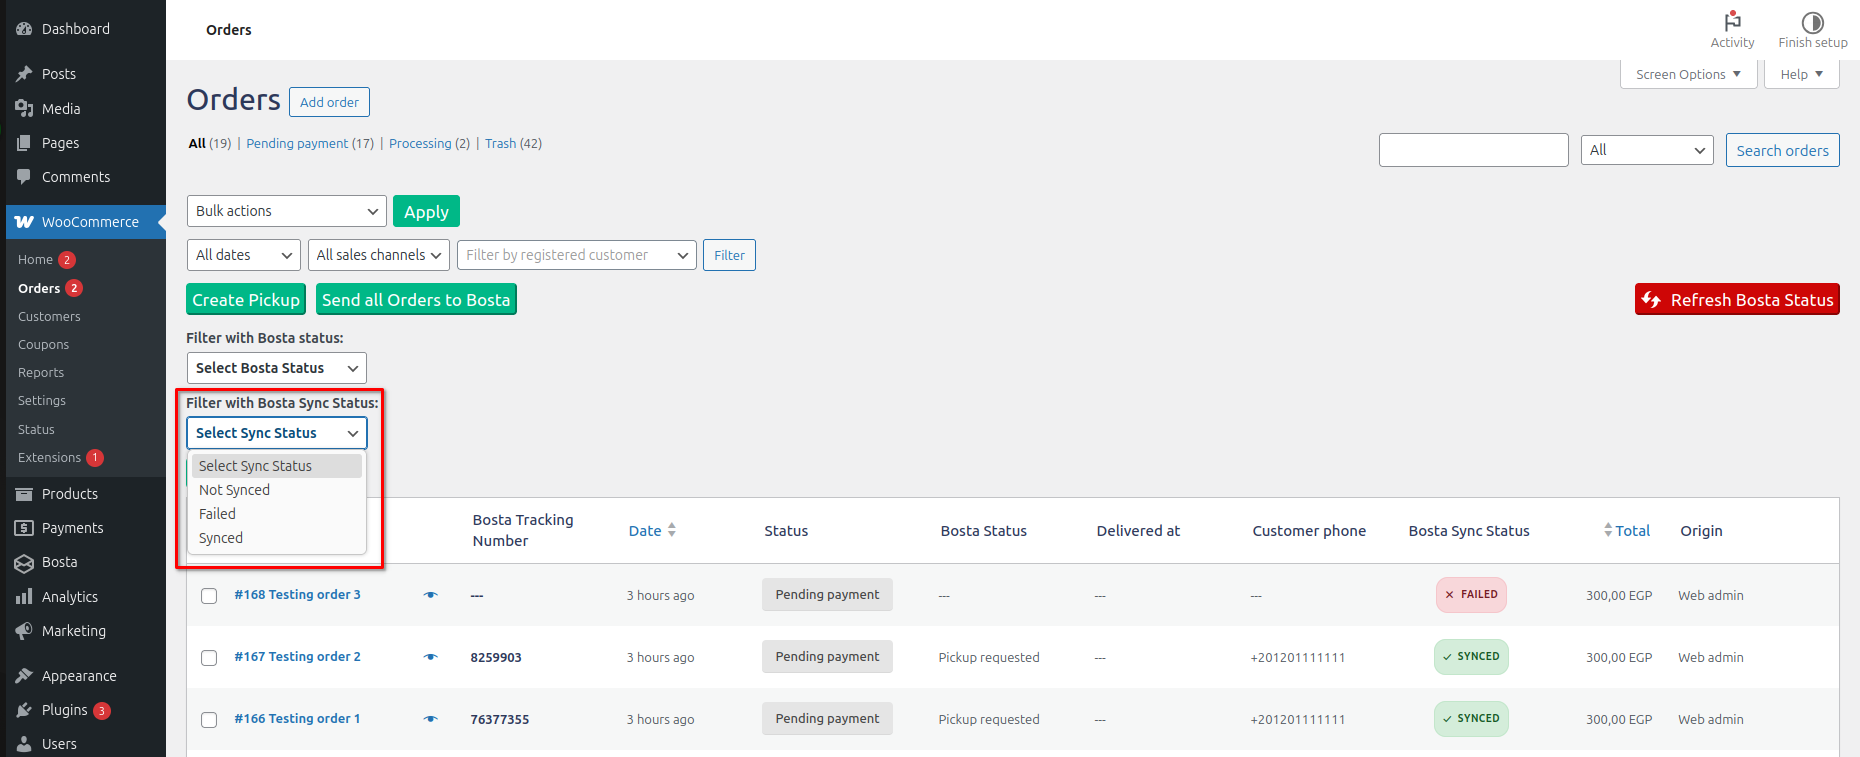
After selecting the filter you want, click Apply Filters
How to Sync Order Updates to Bosta?
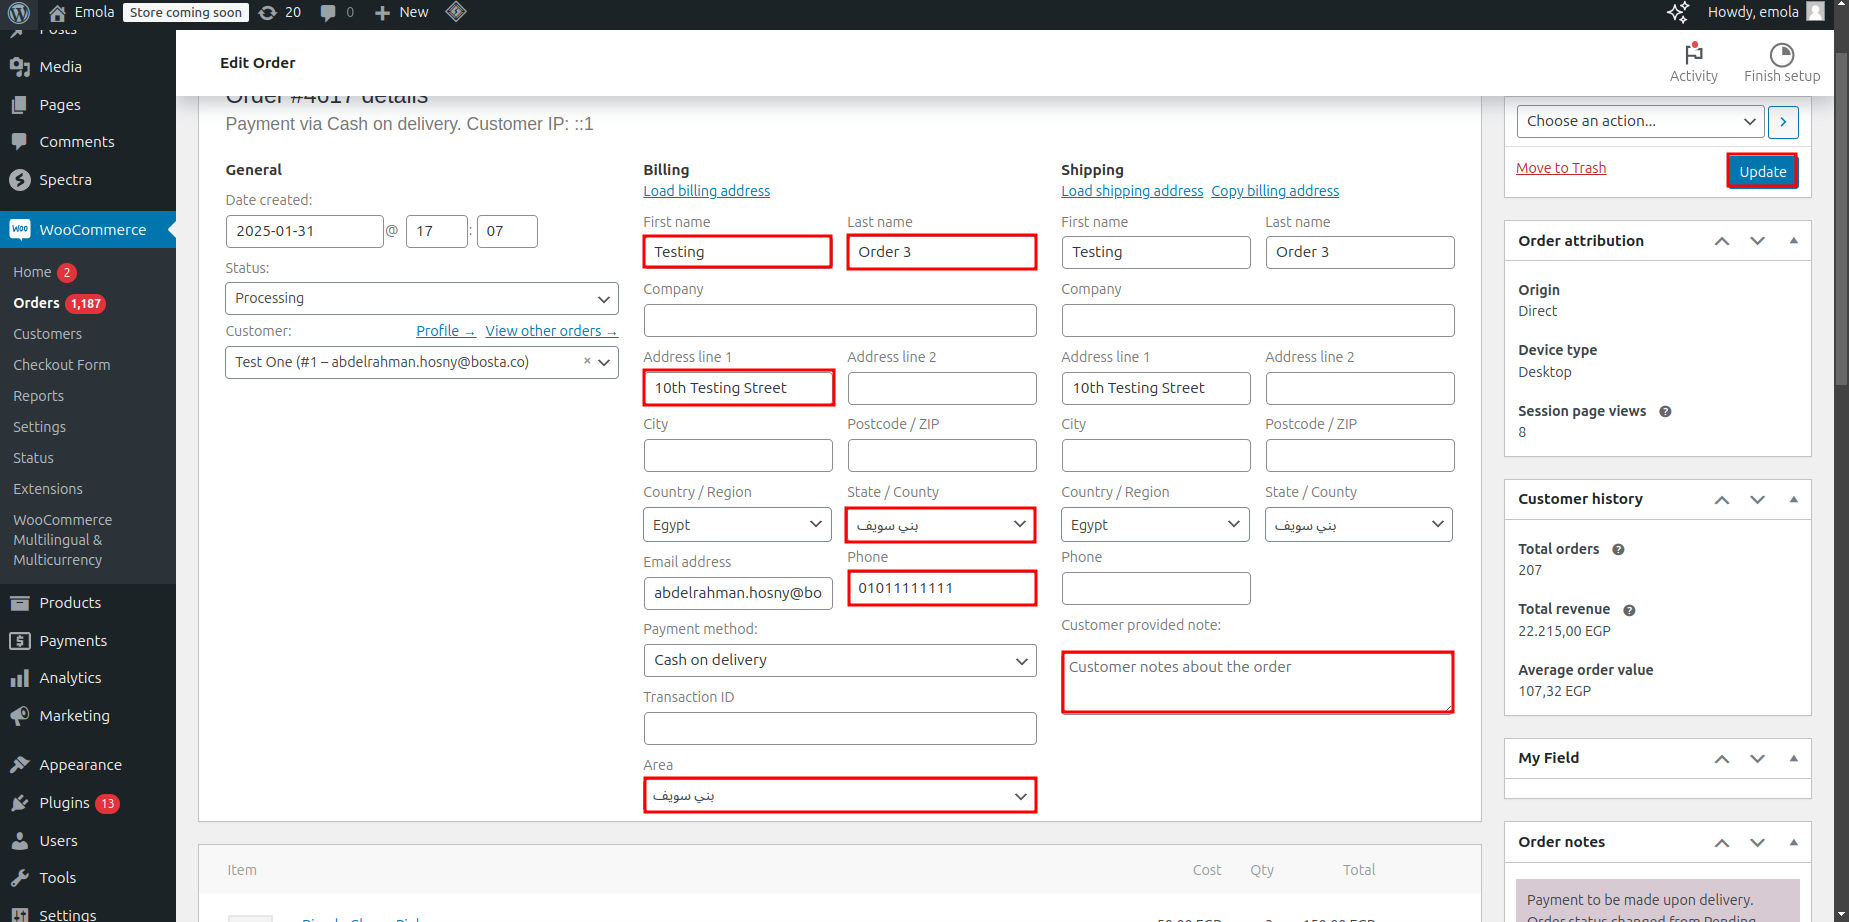
- Any updates to the highlighted fields will be synced to Bosta.
- Note: This only applies if the order is in the Pickup Requested or Created state.
How to Sync Order Deletion to Bosta?
- Select the orders you want to delete and sync to Bosta.
- Open the Bulk actions dropdown list.
- Select Move to Trash.
- Click Apply.
Note: This only applies if the order is in the Pickup Requested or Created state.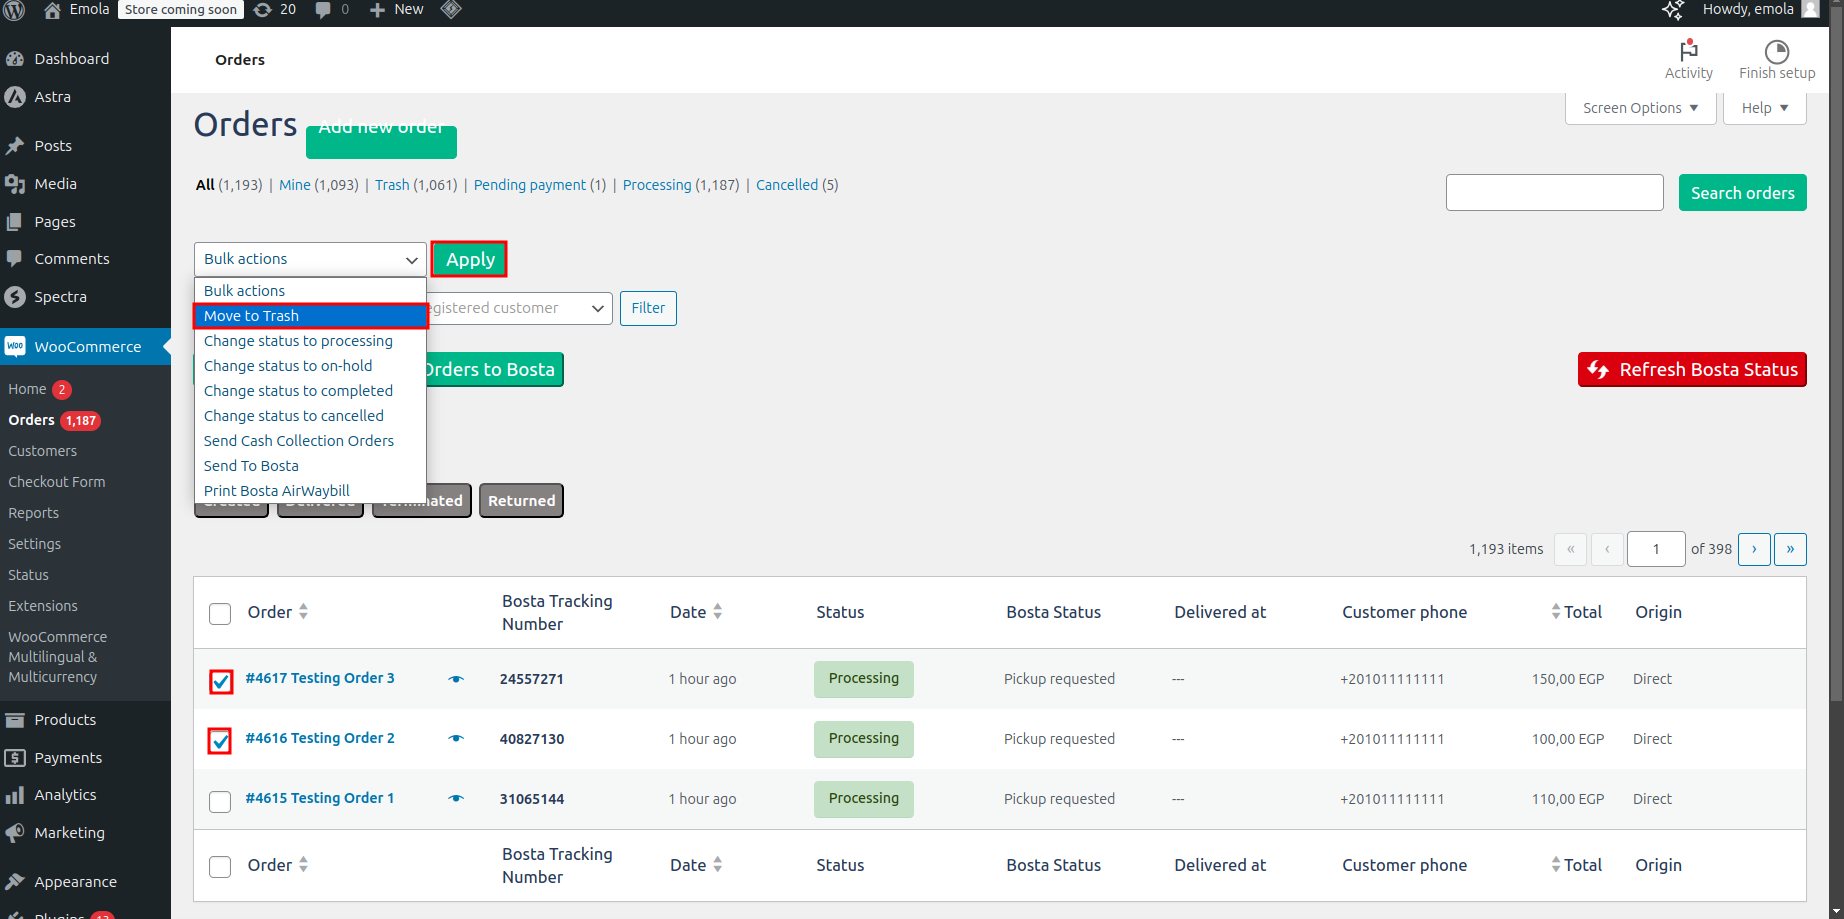
Pickup Requests
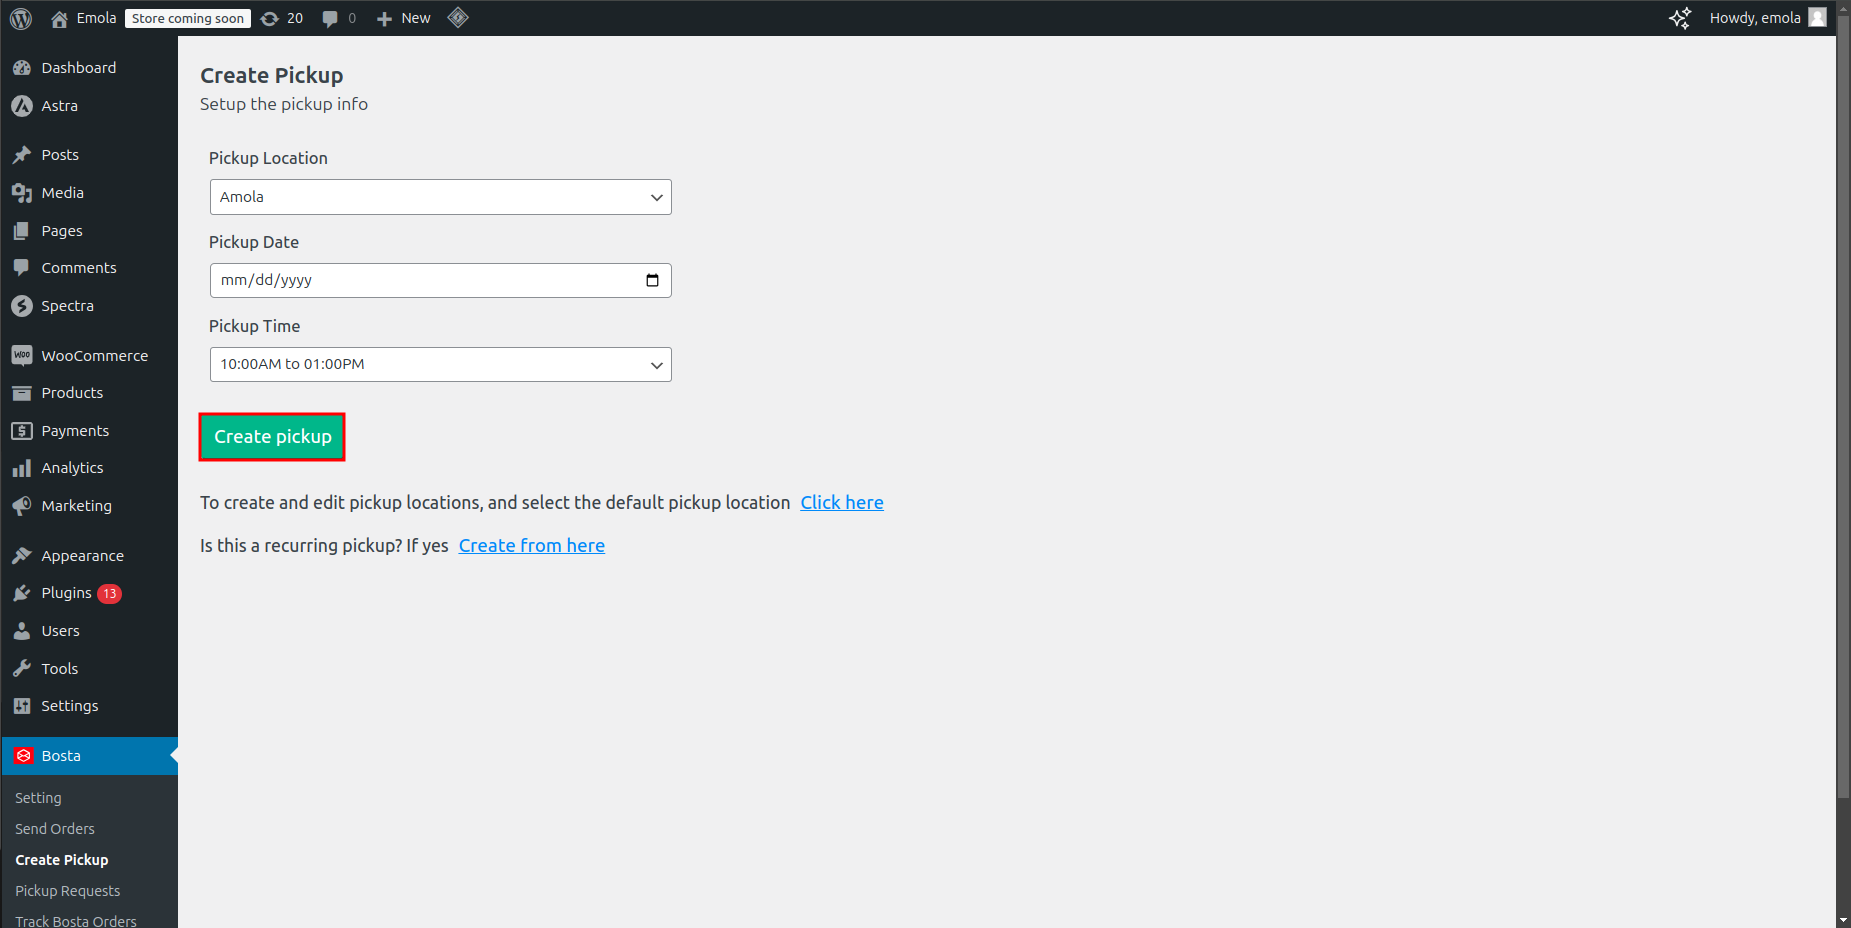
How to Create a Pickup Request?
- Click on the Create Pickup button.

- Schedule the pickup date, location, and time using the form.
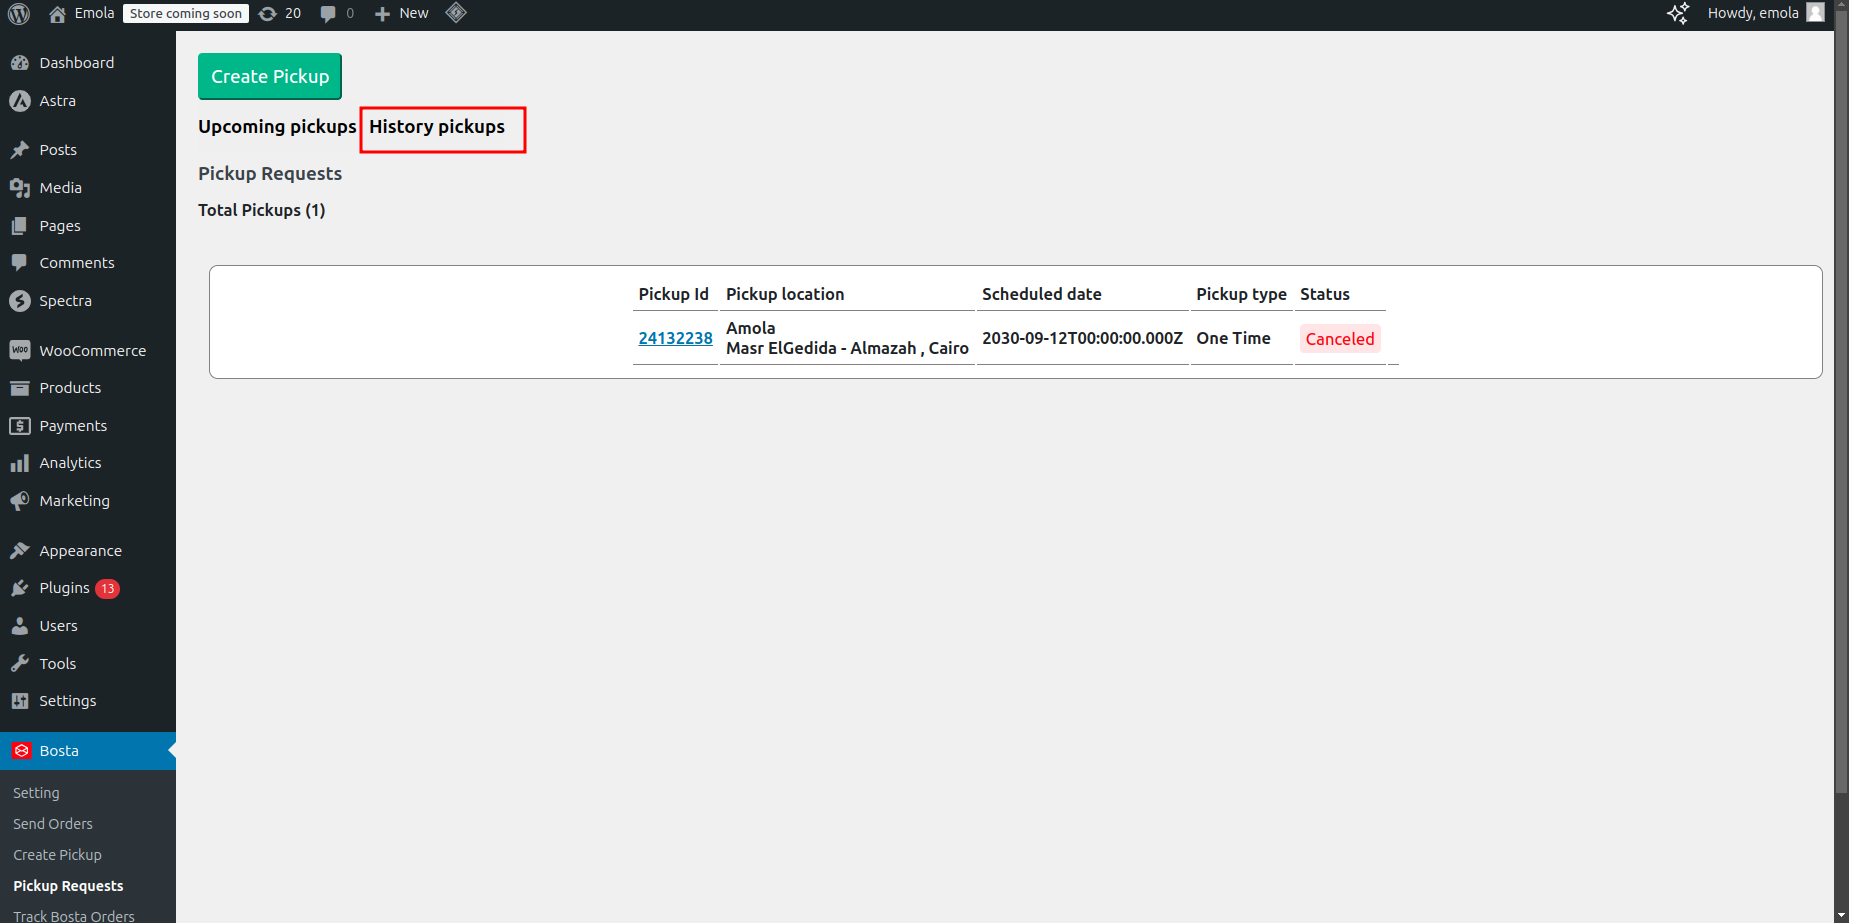
How to Check Your Pickup History and Upcoming Pickups?
- Navigate to Bosta in the sidebar.
- Click on Pickup Requests.
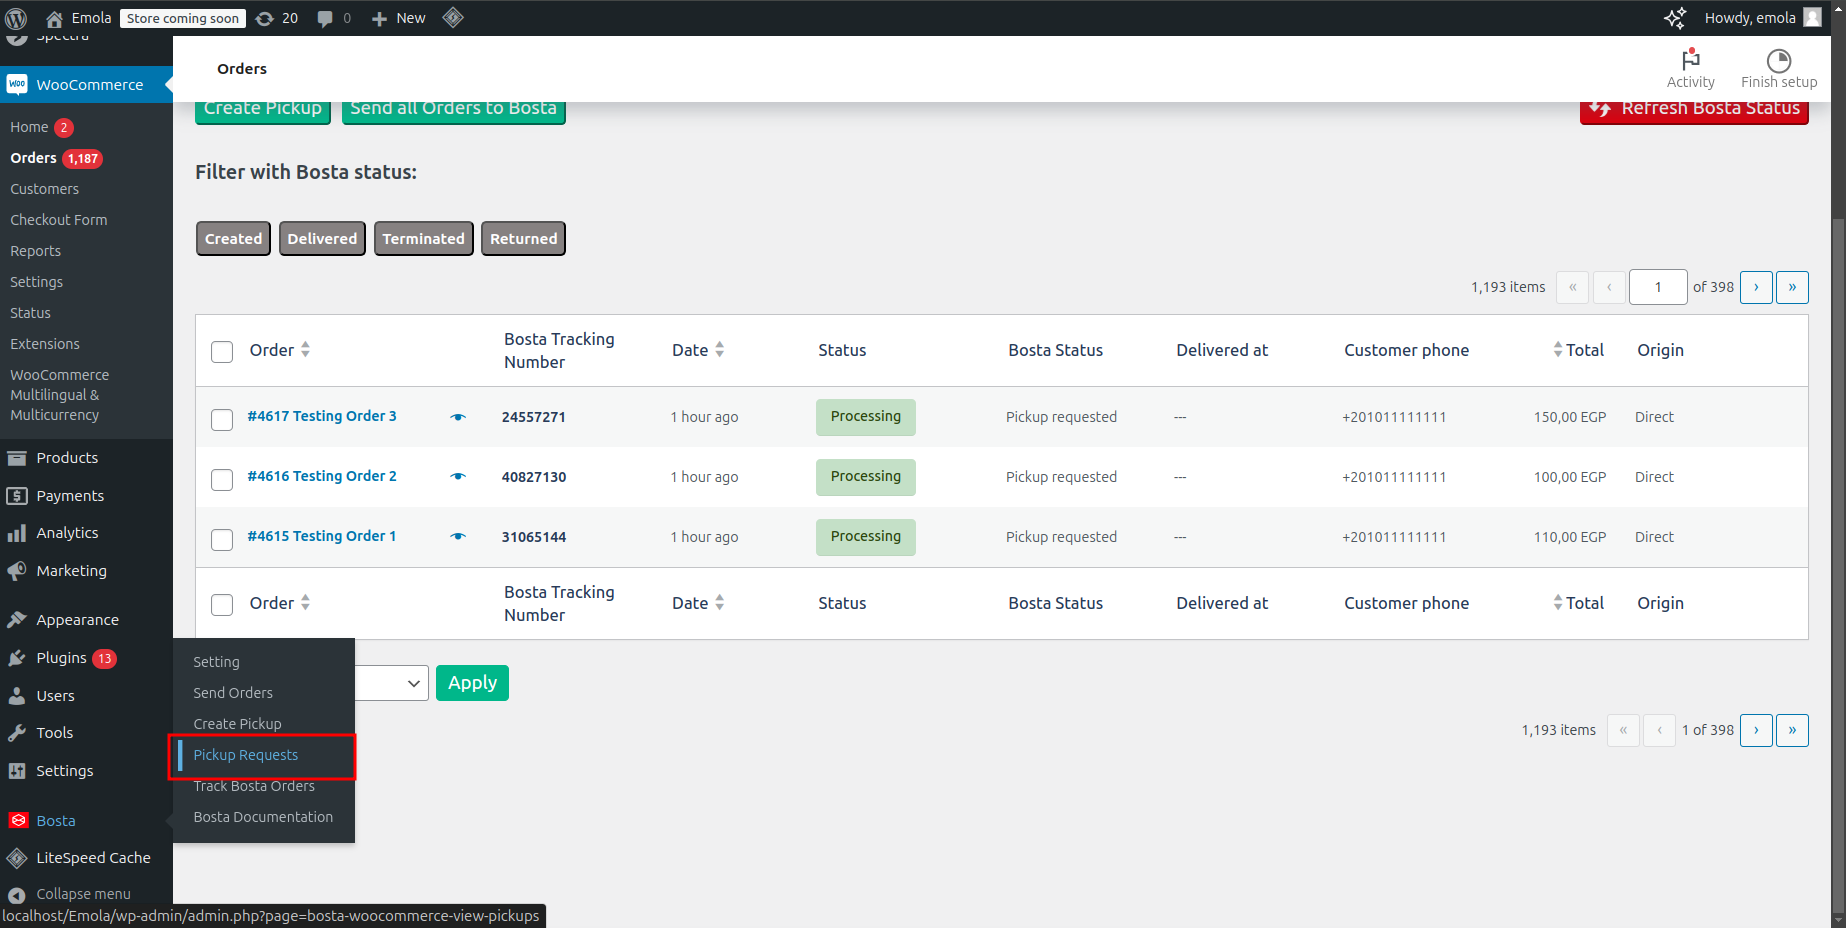
- Upcoming Pickups
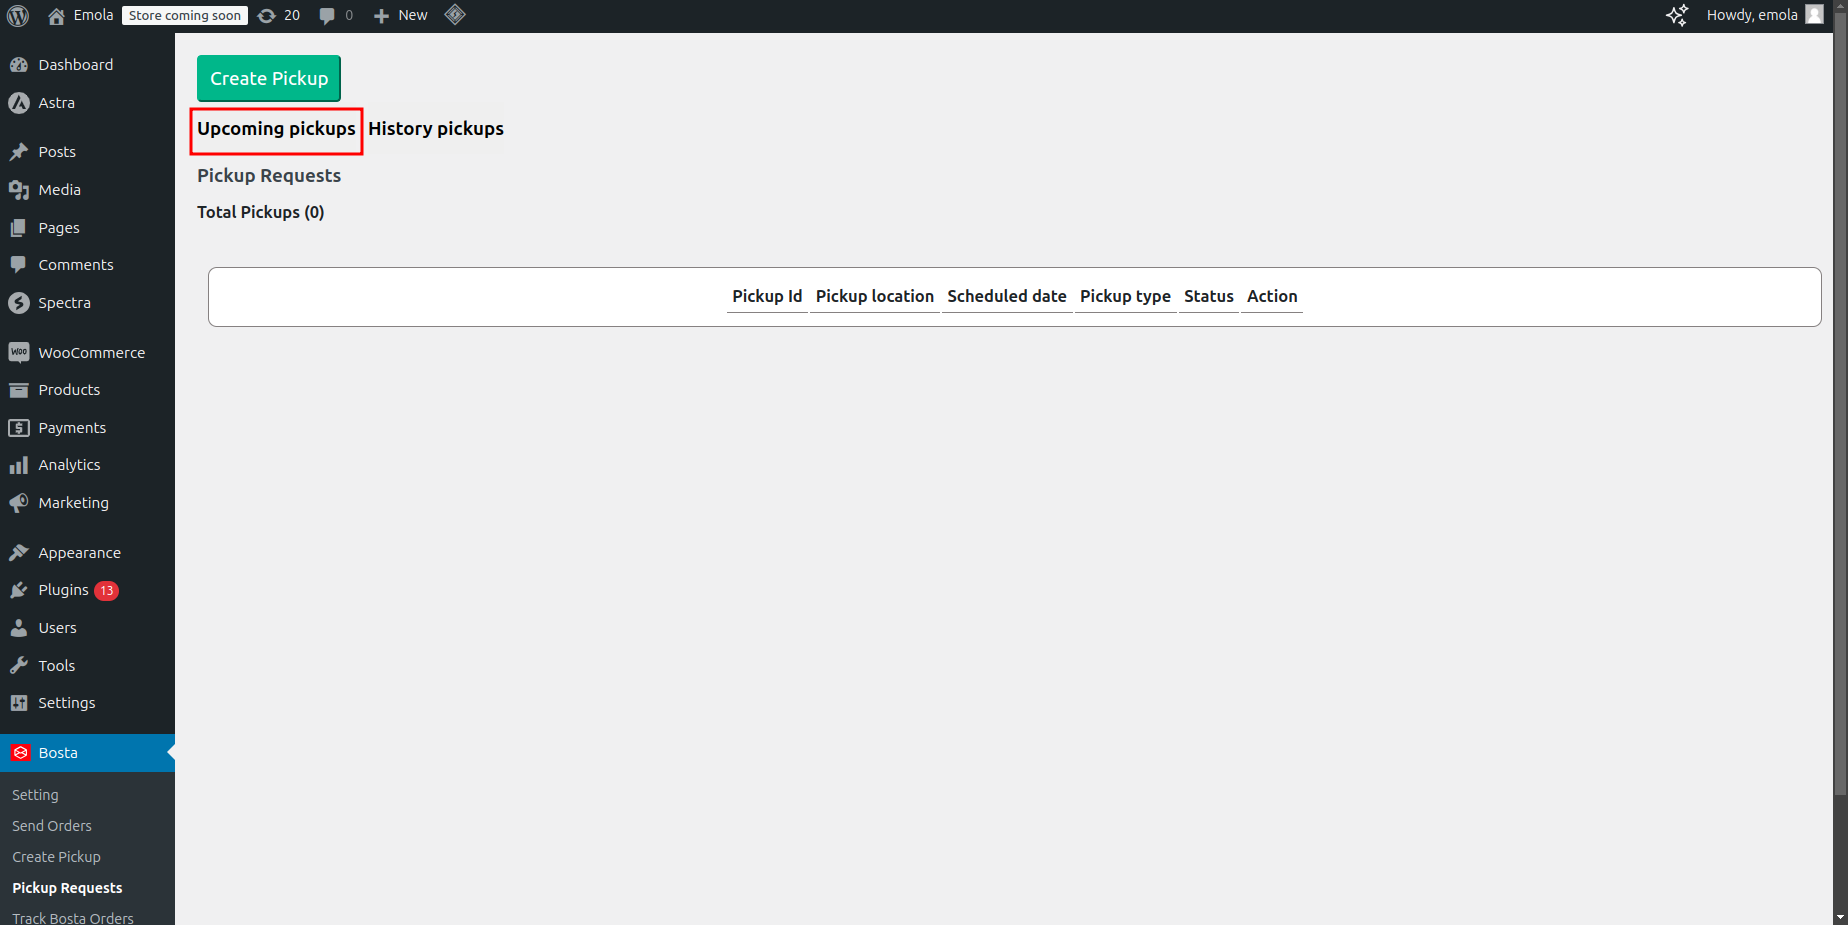
- History of Pickups
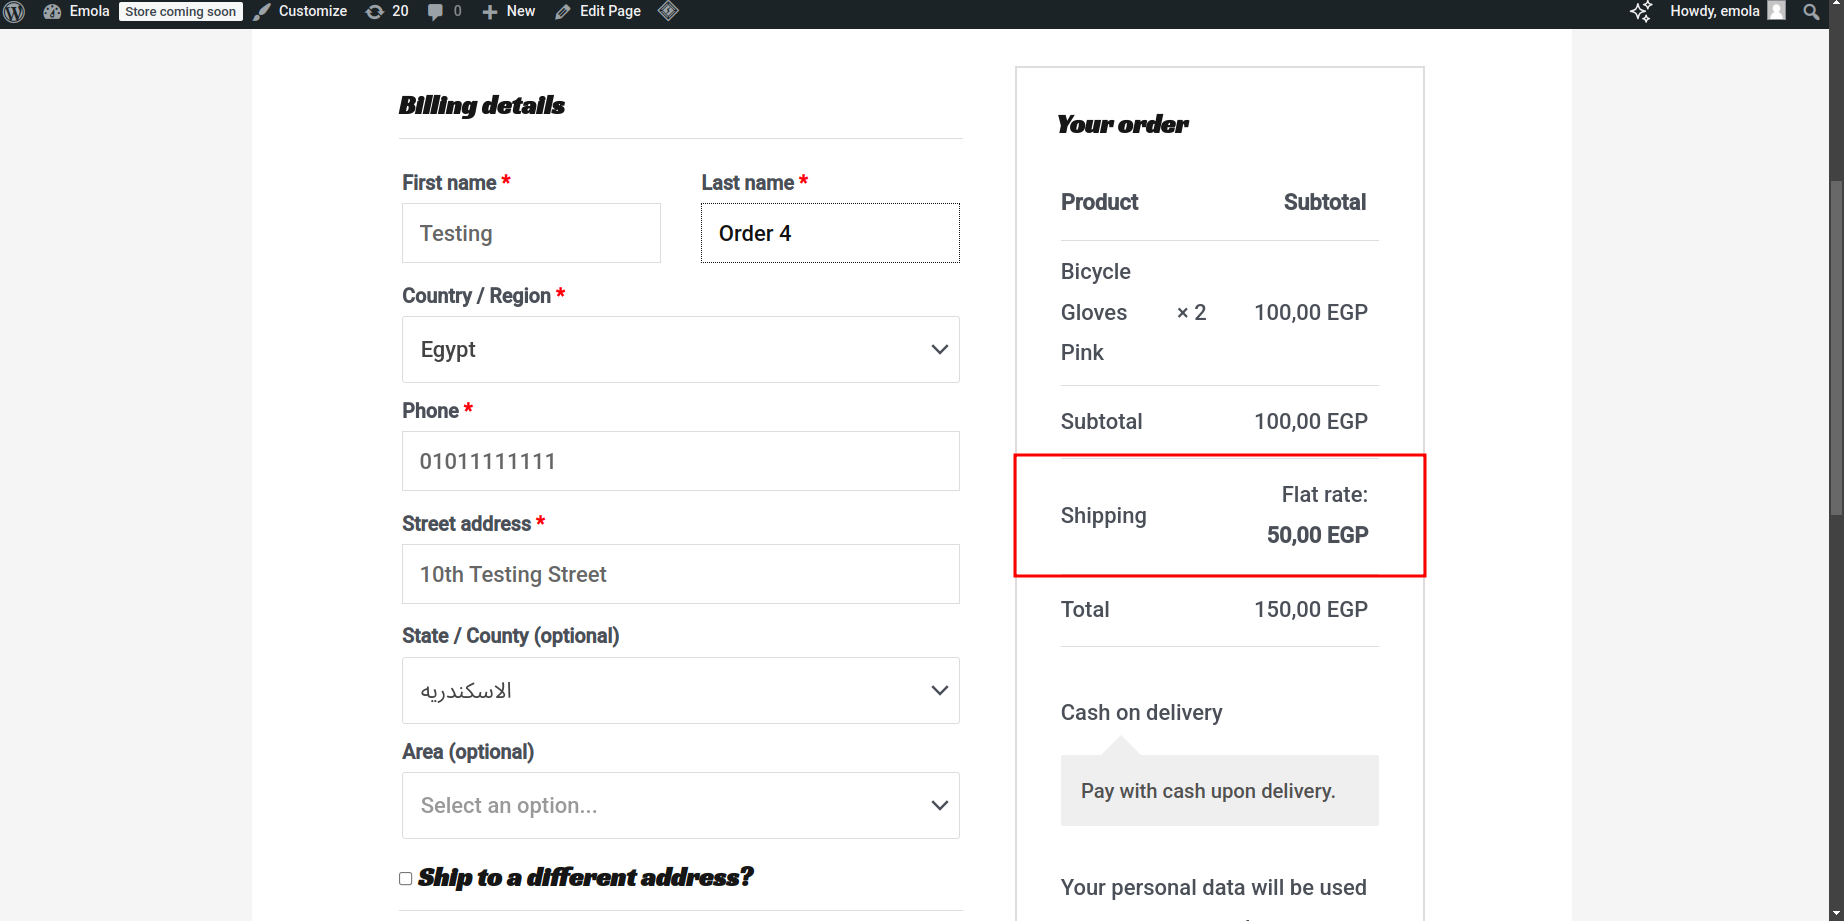
Flat Rate
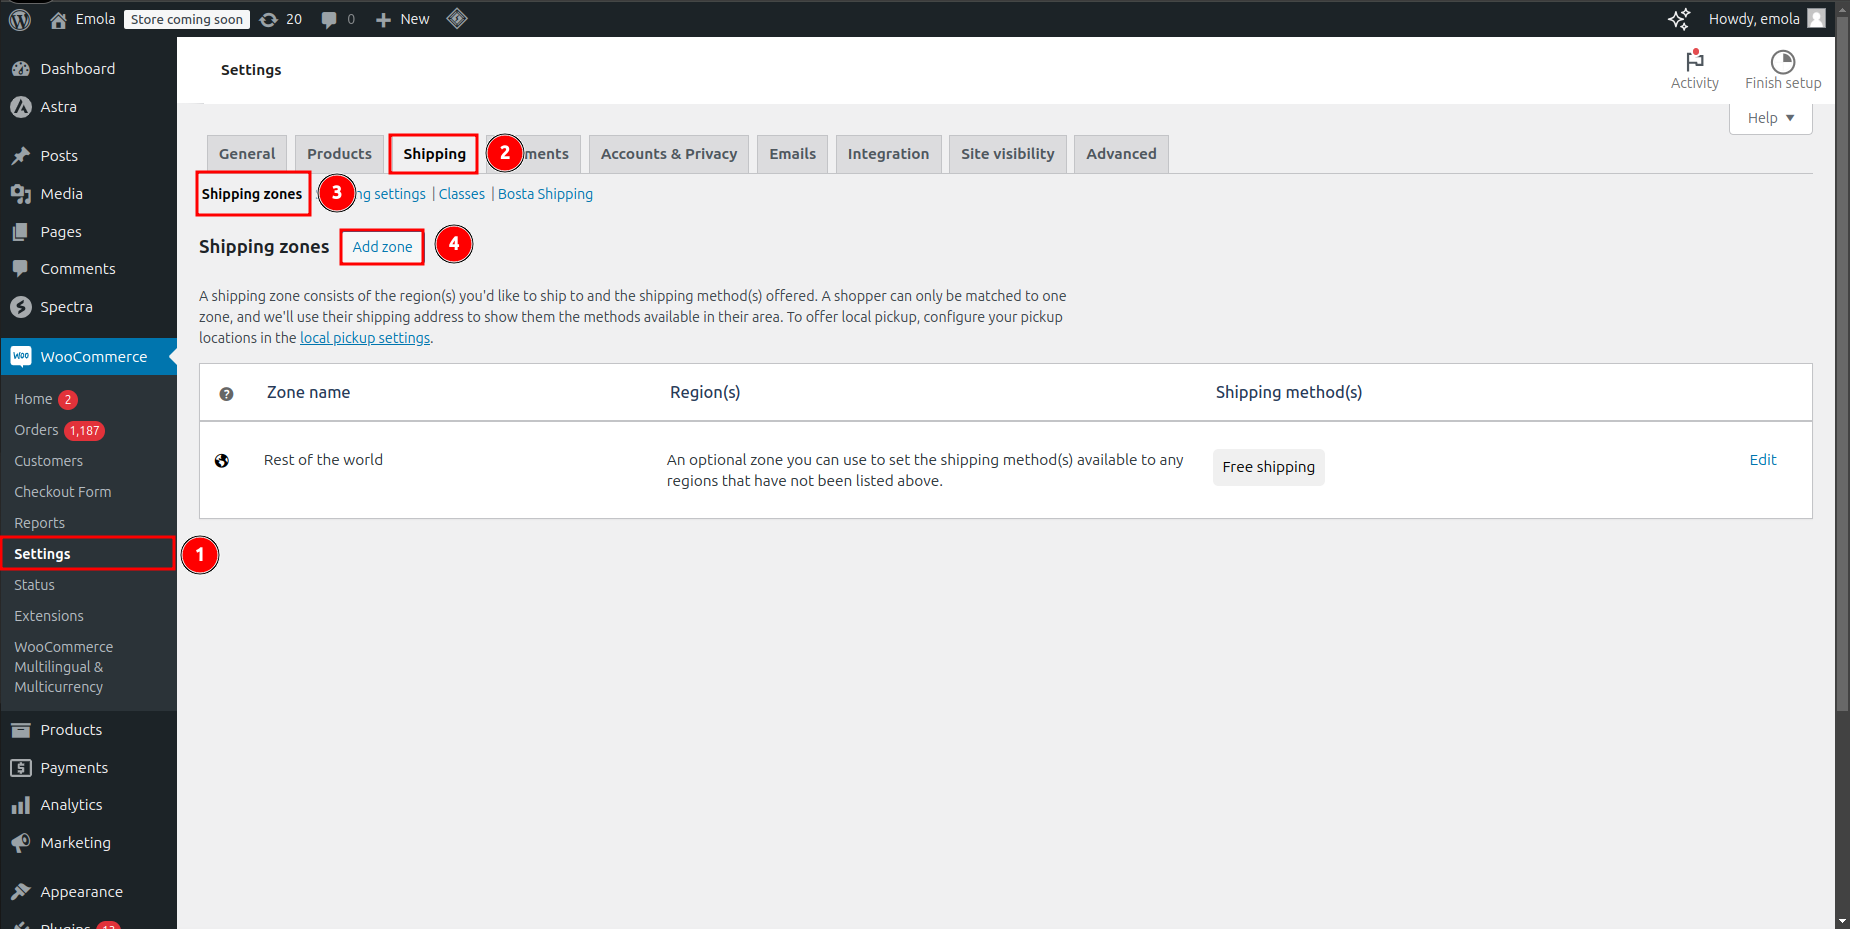
How to Add Custom Shipping Fees to Bosta Cities
- Navigate to Settings.
- Click on Shipping.
- Select Shipping Zones.
- Click on Add Zone.
- Set a name for the zone.
- Choose the Bosta cities that will have custom shipping fees.
- Click on Add Shipping Method.
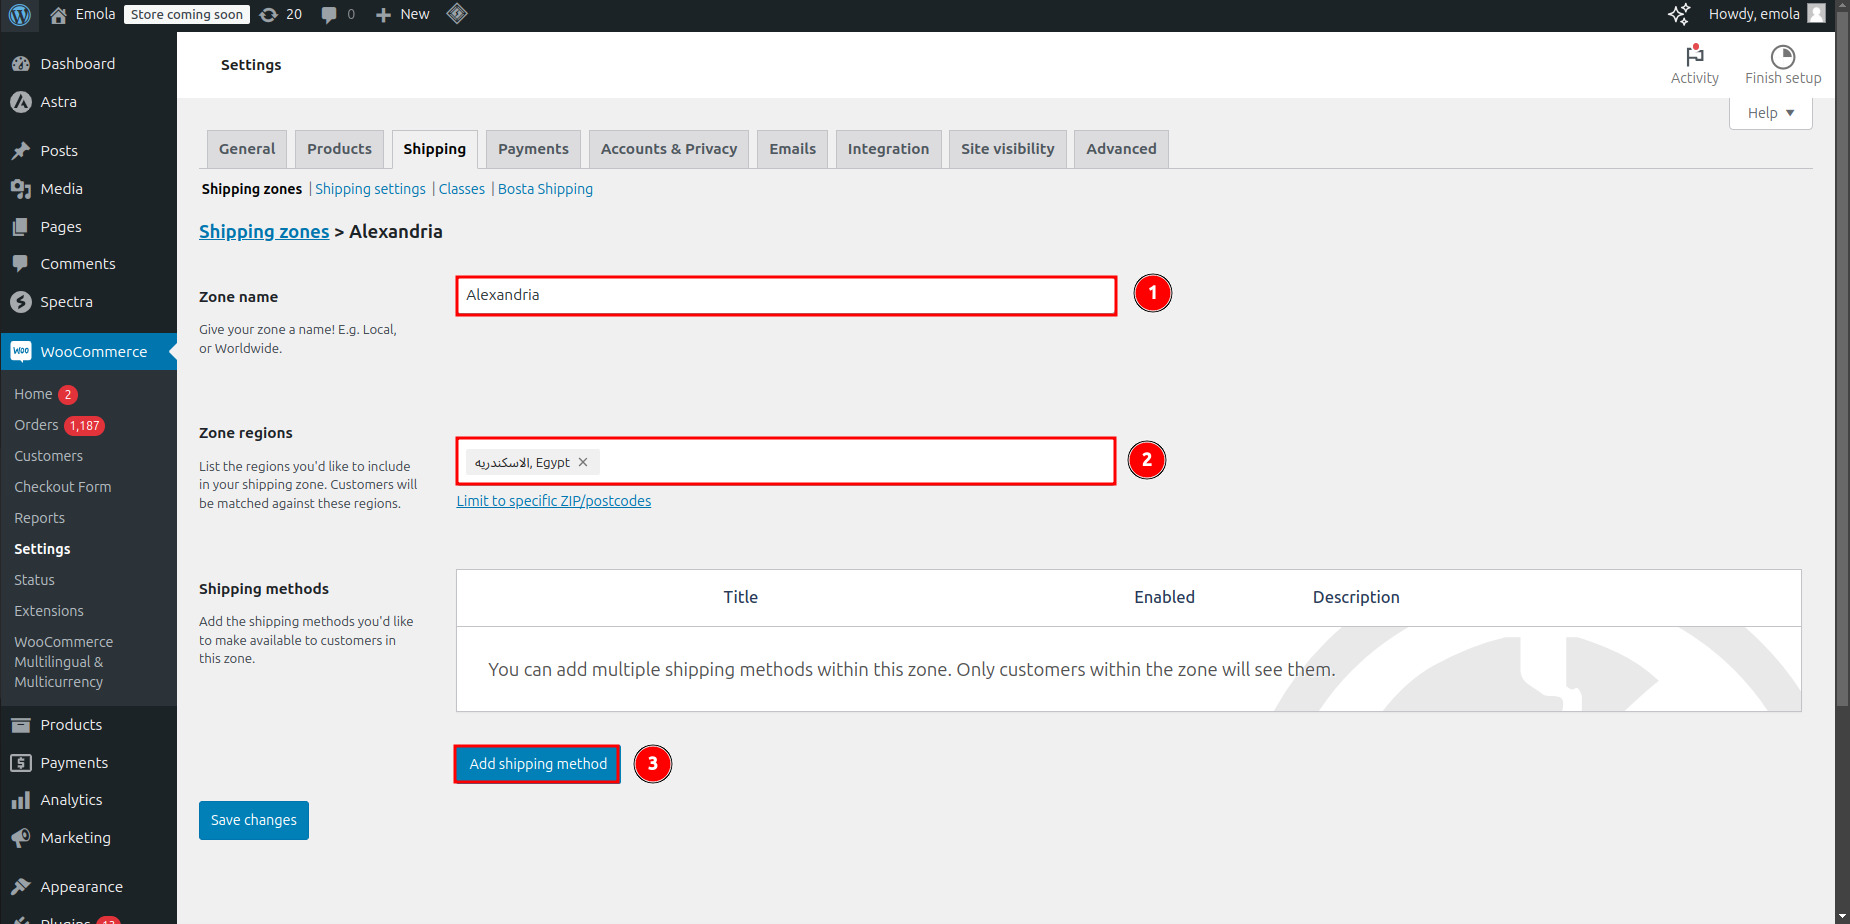
- Select the shipping method.
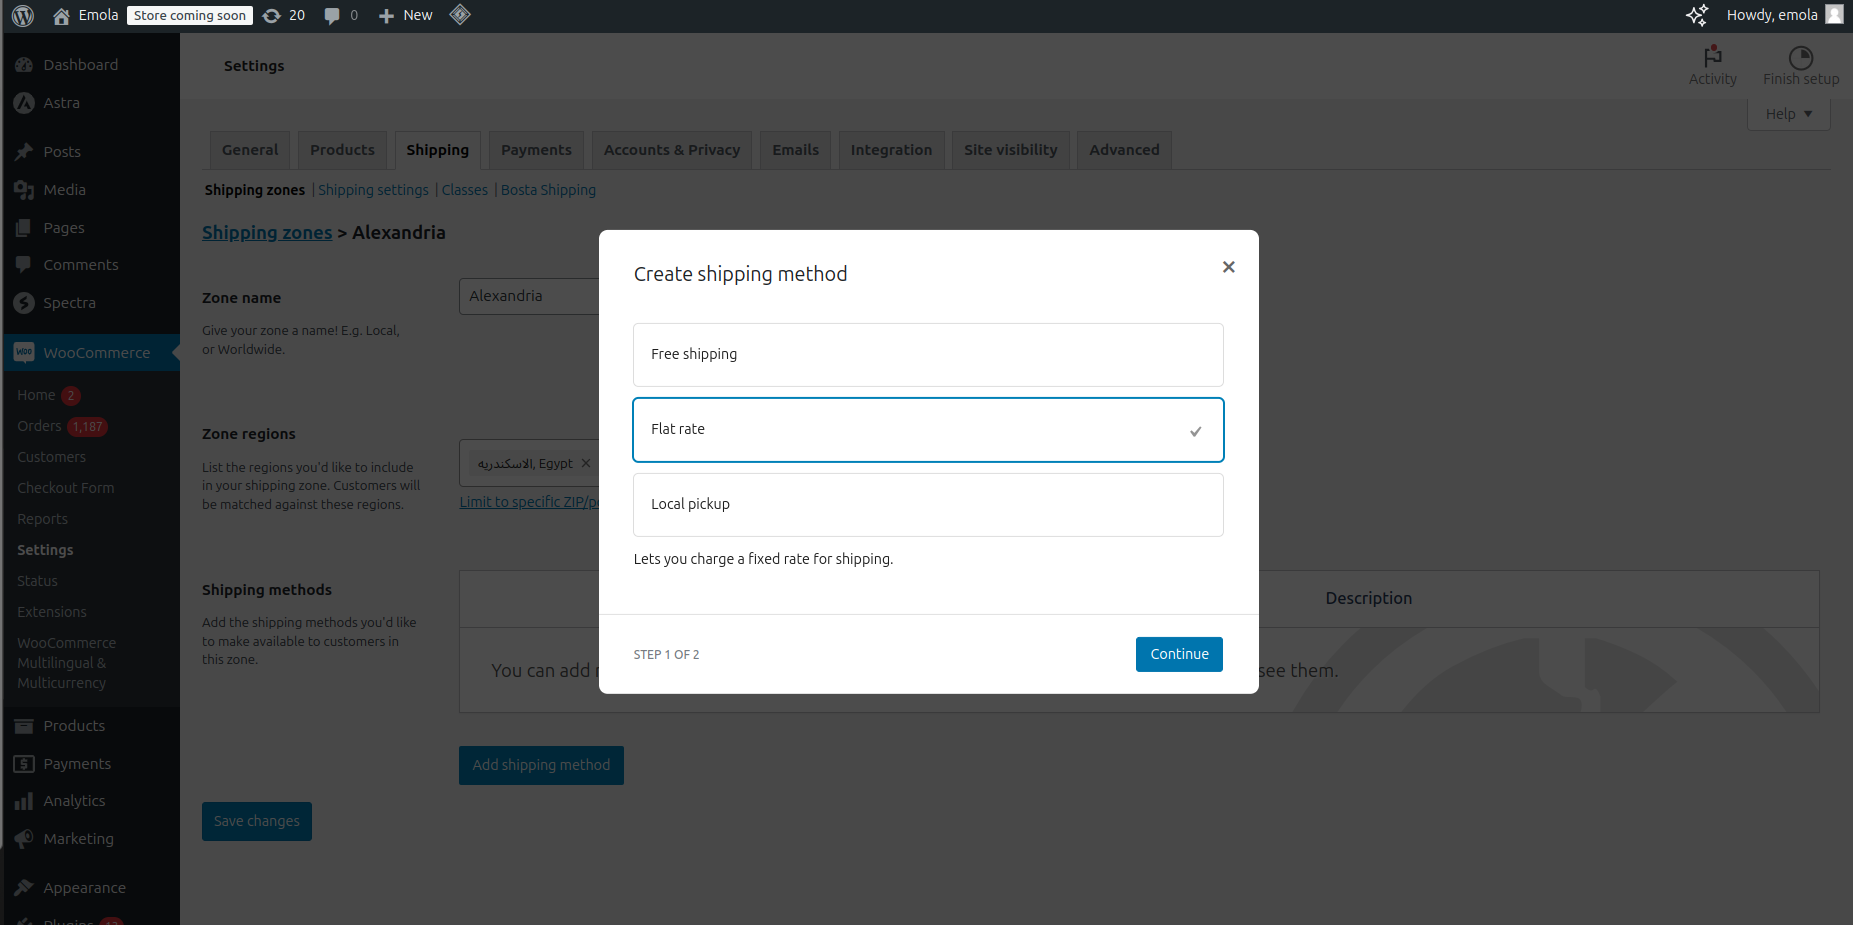
- Add a flat rate and click Save.
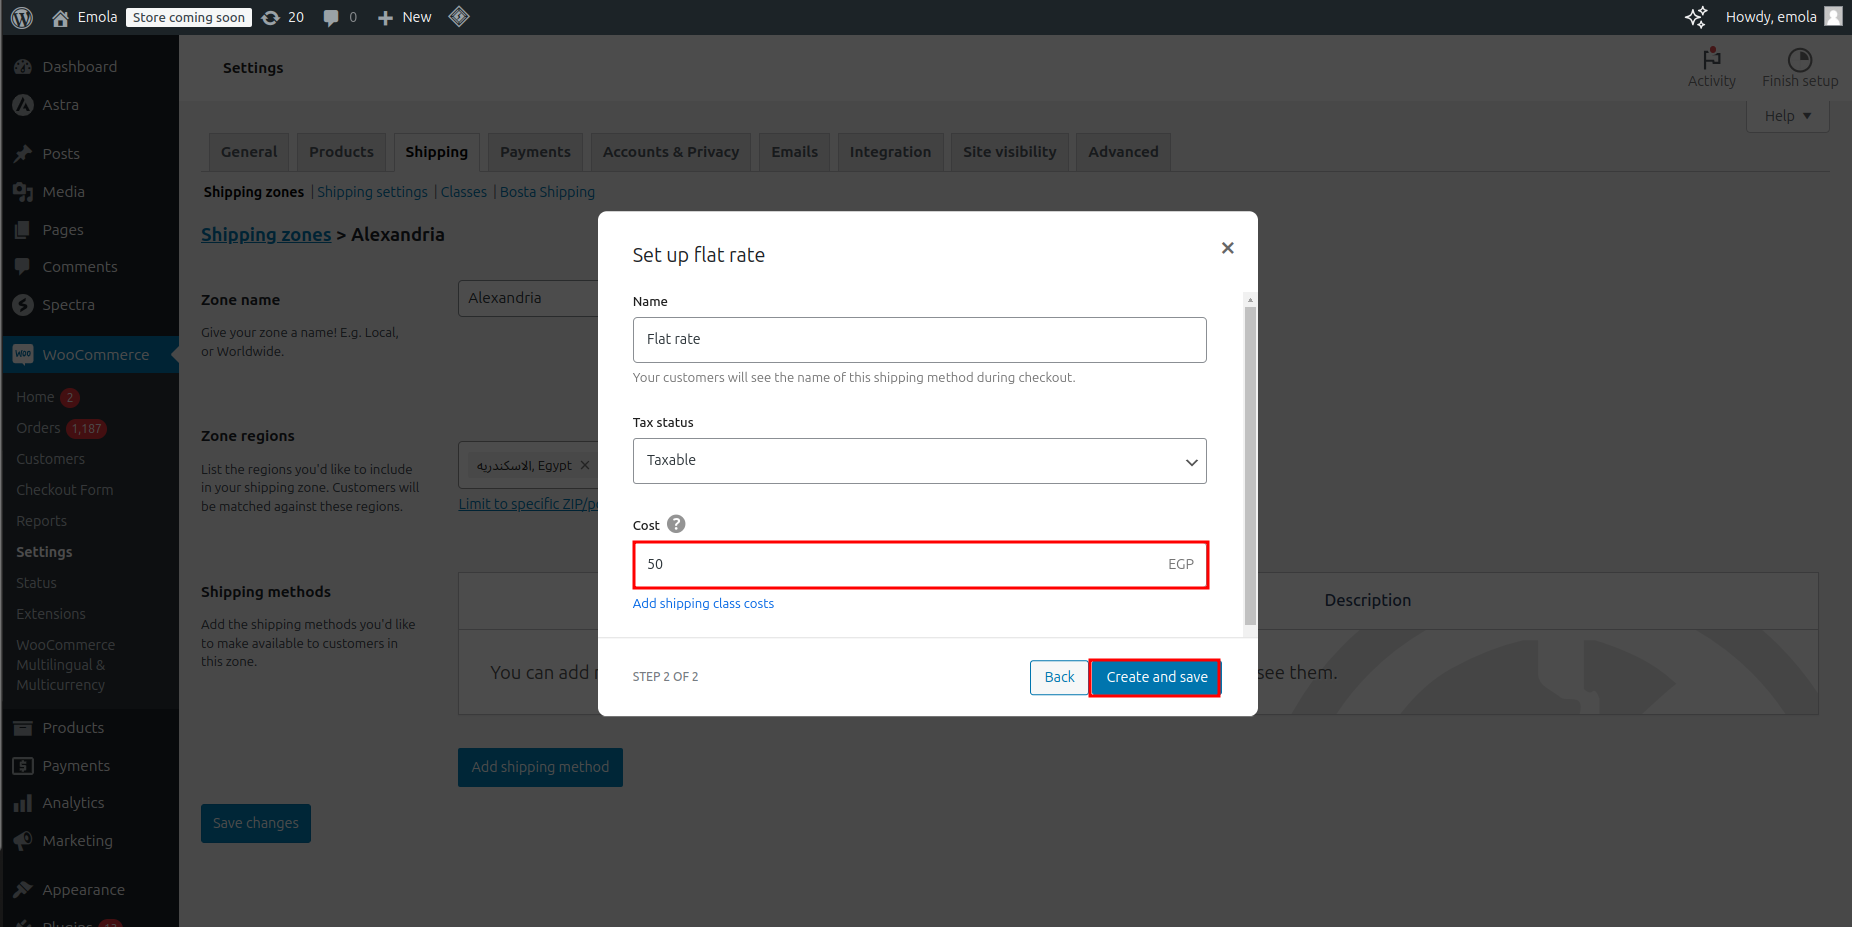
- You have successfully added a custom flat rate for the selected cities.
Feel free to contact us if you need further clarification or support. For assistance, please contact the technical support team at techsupport@bosta.co.